
In this paper, we would like to help you with your selection process for the right tiles. Nothing is more frustrating than choosing a product, without knowing how to differentiate the quality from good to bad. Quite often, we also find, that the right information is very difficult to obtain and with very little transparency. As a world leading manufacturer of porcelain tiles, exceeding international standards 10 or even 20 times, we would like to share with you the tips and tricks that define the quality and how to identify them.
Very often you would see tiles that are priced at 20 AUD/sqm in one store and then very similar ones for 120 AUD/sqm in another. But why is there a price difference and how does that translate into quality?
Usually the only argument would be: “that tile is made in Italy, that tile is made in Spain, China, India, etc.” But what does it really tell you? And what is the difference between tiles from the same country of origin? And therefore, the usual wrong questions that customers like to ask, is logically: “where are your tiles from?” In expectation that the country of origin would tell them EVERYTHING about the quality of that tile. Nothing is less true.
We would like to explain what you need to look for in order to assess and compare the quality between different tiles, as well as what would be the right questions to ask.
PRINT QUALITY
This is probably the most important aspect that defines the quality. Leading manufacturers invest a lot into achieving products that look just like real natural stone. It starts with cooperation with leading design studios that create most beautiful and unique looks replicating natural stones. While average factories, would just try to copy or have very basic design files. Design Files combined with the latest printing technology equipment define the overall result. Kaolin’s most obvious benefit is our print quality.
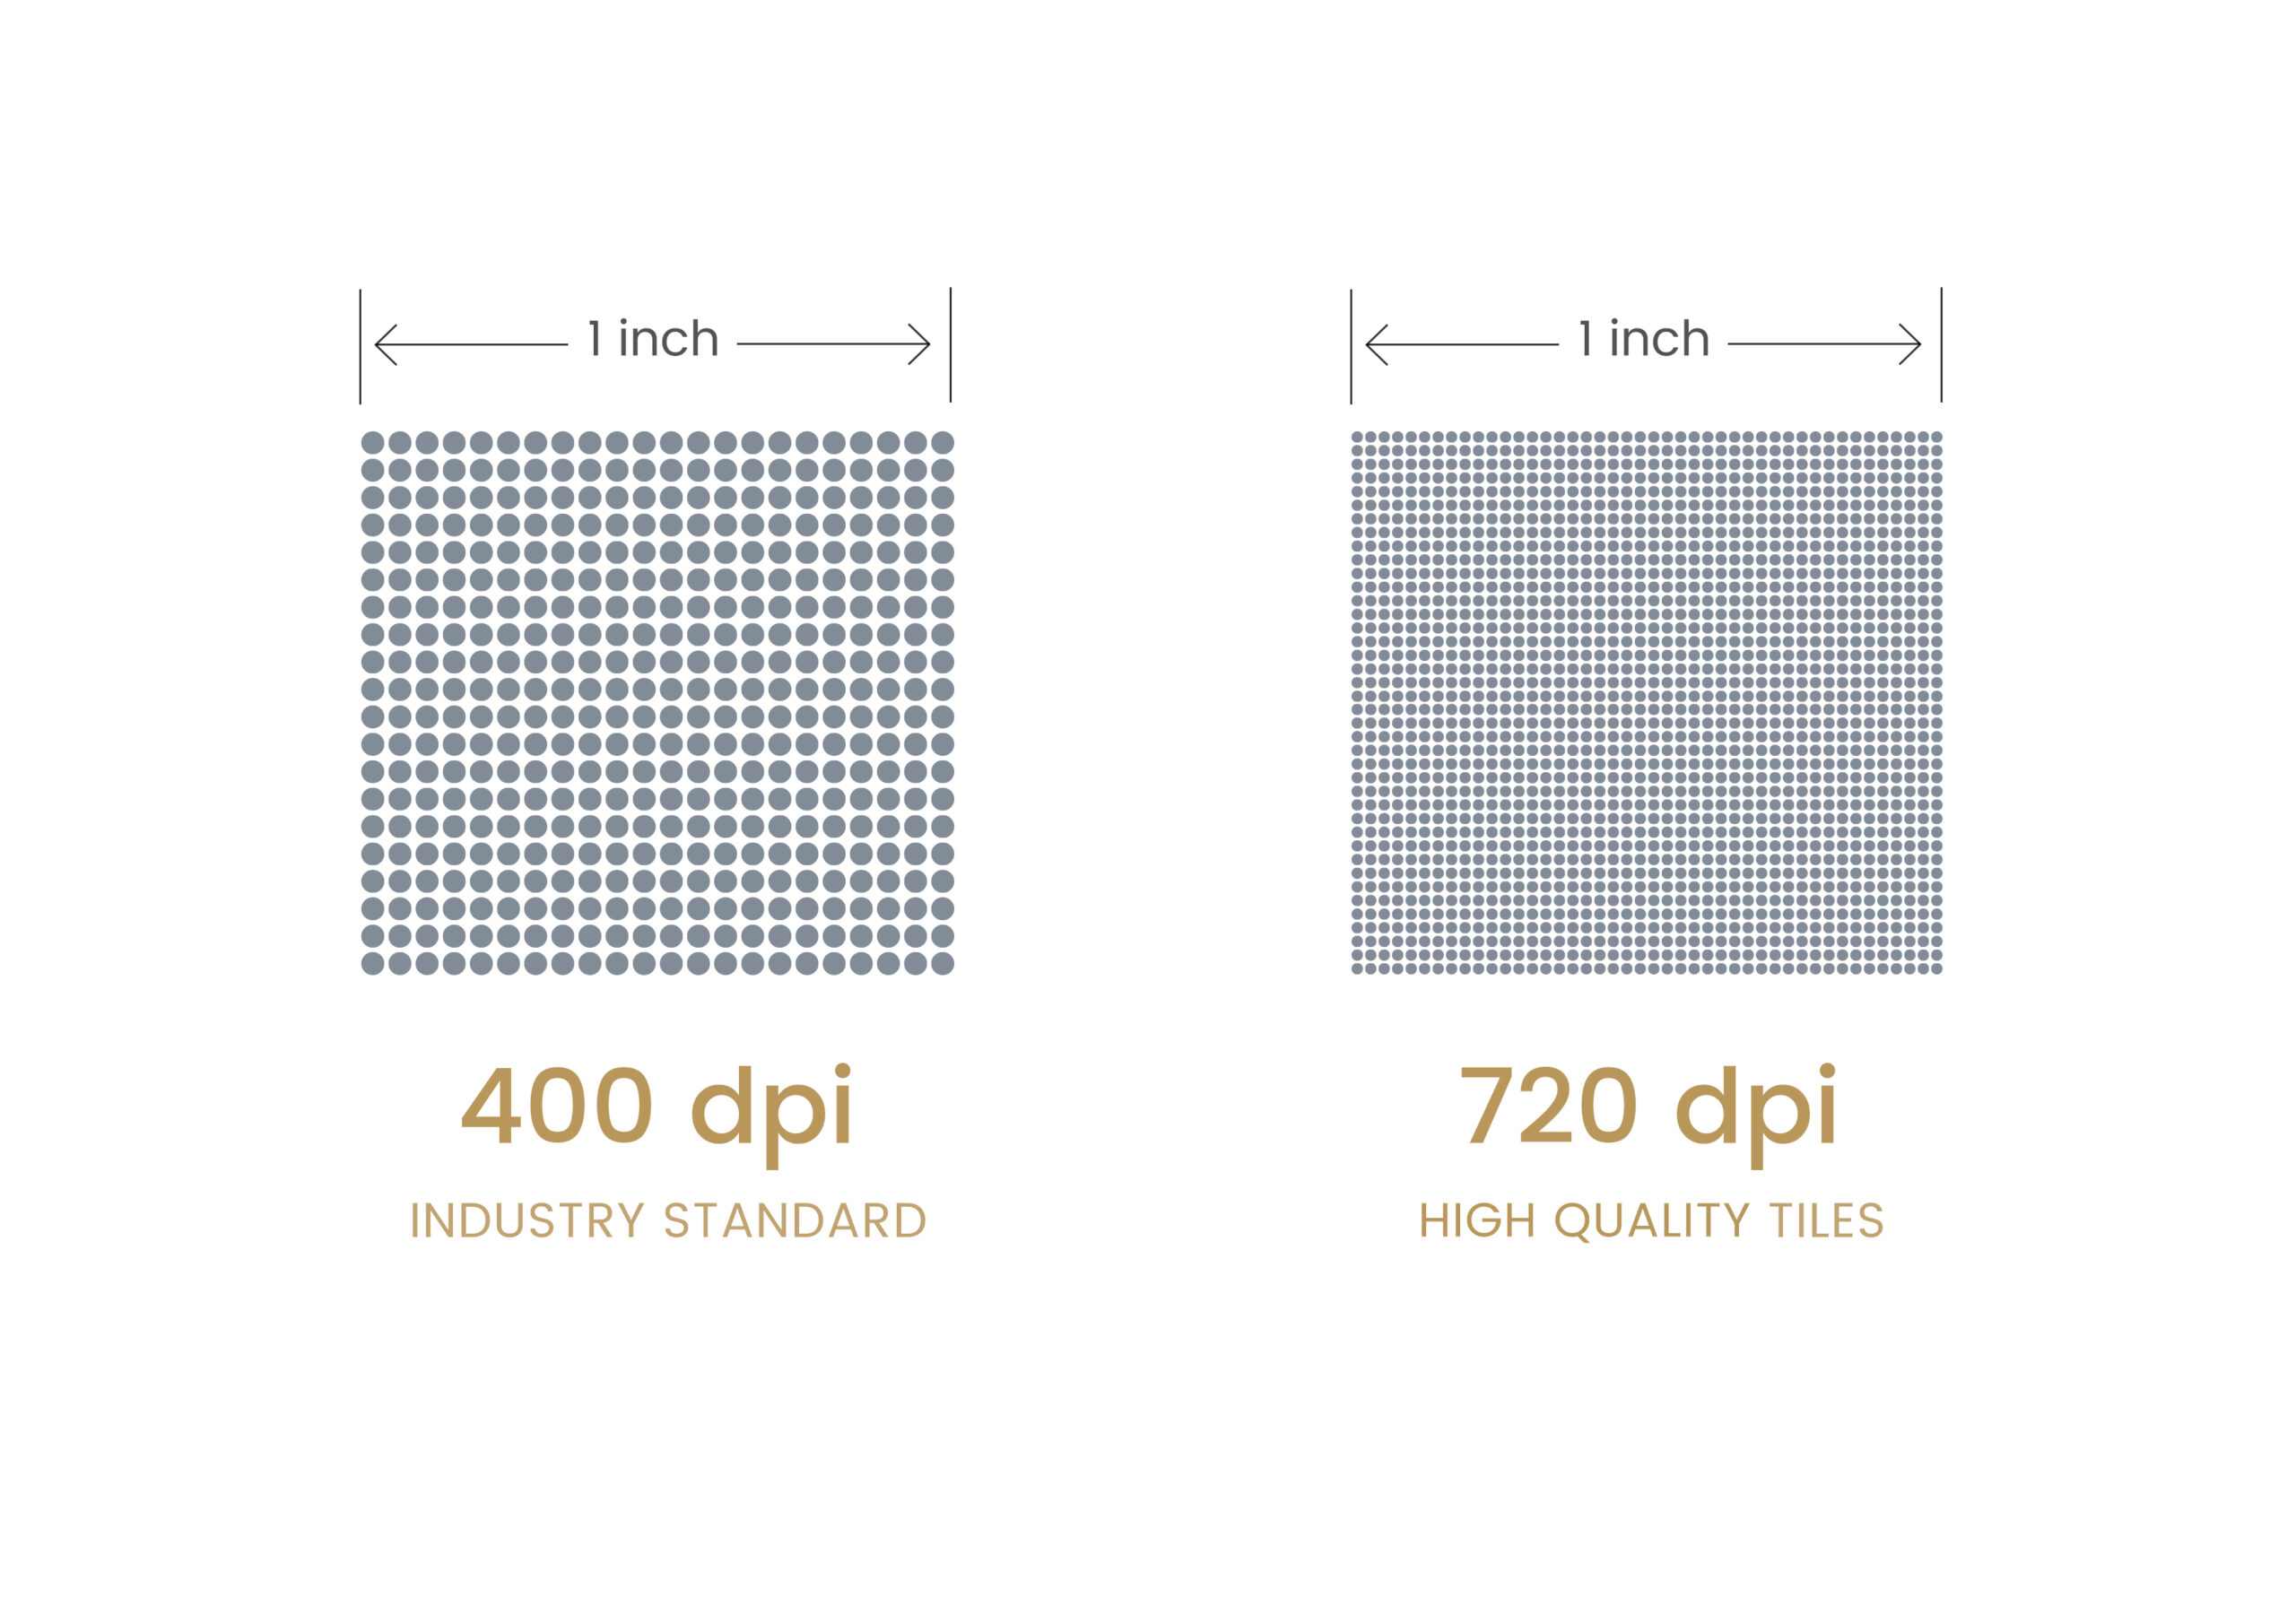
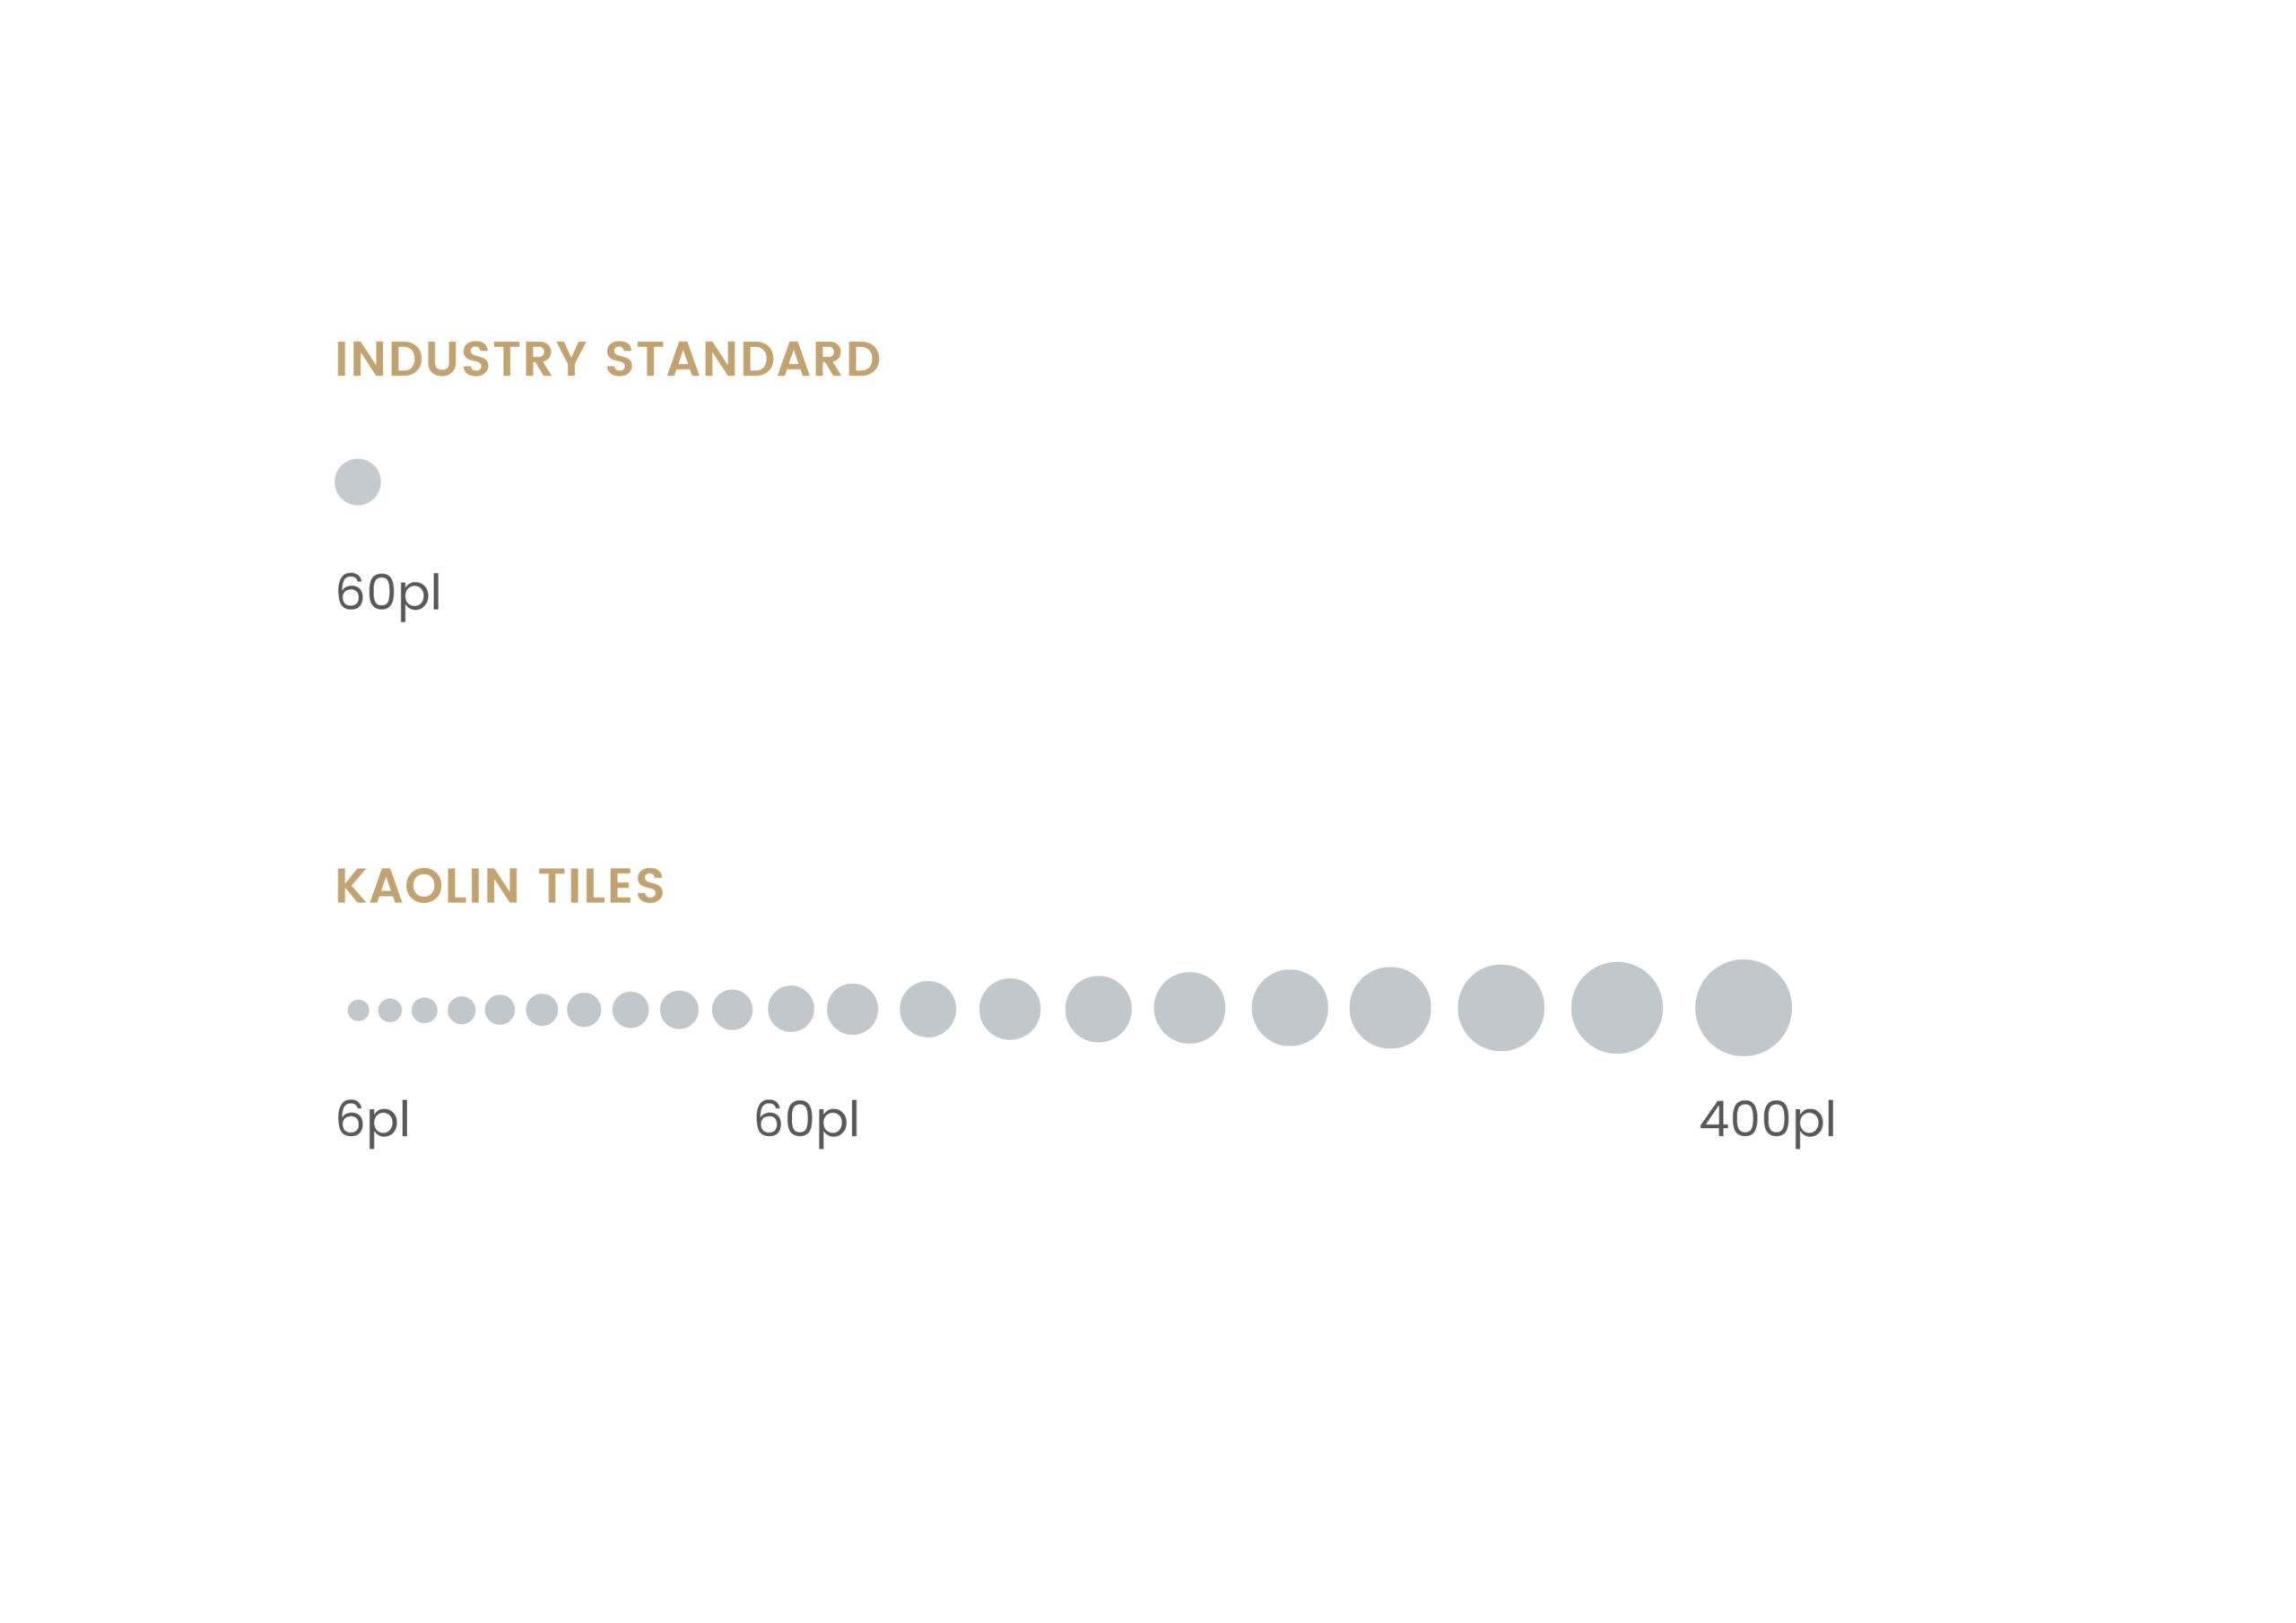
Our Kaolin factory uses the industry best printing technologies to reproduce stone and marble to the finest detail, without pixelation and creating a depth not seen before in a porcelain tile. One of the biggest down falls of porcelain tiles to this point has been the digital inkjet print limiting design and creating a tile that was very easily picked as a poor imitation of the real stone. This was mainly due to technology only offering ceramic printing to a maximum of 300-400dpi and a binary or single size ink drop. This old technology can easily be seen in transitions of pattern to plain areas and fades as pixelation.
DESIGN FILES
The creation of each single look is a sophisticated process that starts with identifying the source of inspiration. There are very basic and simple looks, such as concrete for example, that do not require very complex designs. Those and other plain colour designs are usually dated and not designed for latest state-of-the-art technology. Precious stone looks, on the other hand, that become possible thanks to the advanced printing technology, require a very in-depth and sophisticated design file. The creation starts with scanning of real natural stones and improving its looks that gets translated into an image. Those images are a combination of different layers that combined together makes an almost 3-dimensional look.
The creation of each single look is a sophisticated process that starts with identifying the source of inspiration. There are very basic and simple looks, such as concrete for example, that do not require very complex designs. Those and other plain colour designs are usually dated and not designed for latest state-of-the-art technology. Precious stone looks, on the other hand, that become possible thanks to the advanced printing technology, require a very in-depth and sophisticated design file. The creation starts with scanning of real natural stones and improving its looks that gets translated into an image. Those images are a combination of different layers that combined together makes an almost 3-dimensional look.
LAYERED PRINT
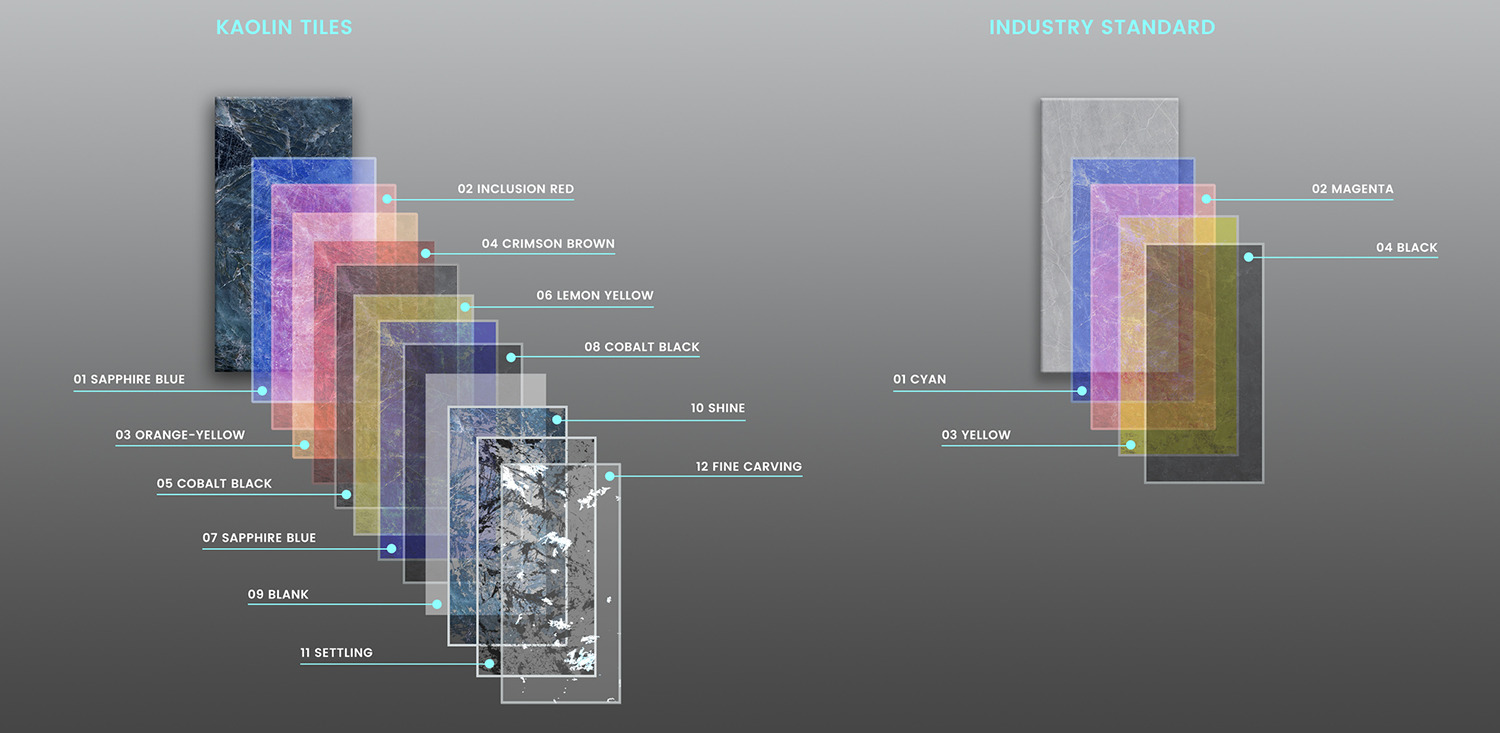
We take this technology further with tiles like our Precious Stone and Showpiece ranges printing up to 12 layers to create a depth to the tile usually reserved for natural stone.
Tiles are normally printed with just 4-5 layers or channels, one for each of the main ink colours (Cyan, Magenta, Yellow) plus Black and then a finish or texture print. Kaolin will print this base range to create the basic design but then layer the tile with additional features of print sitting much higher in the glaze layer creating an almost 3-dimensional effect.
PRINT LINES
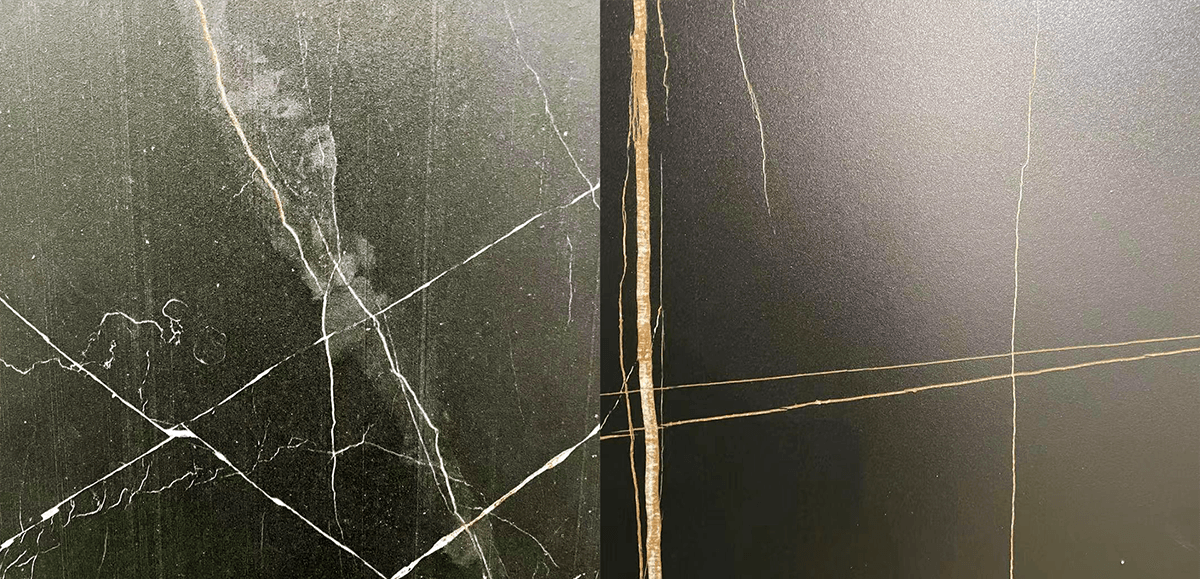
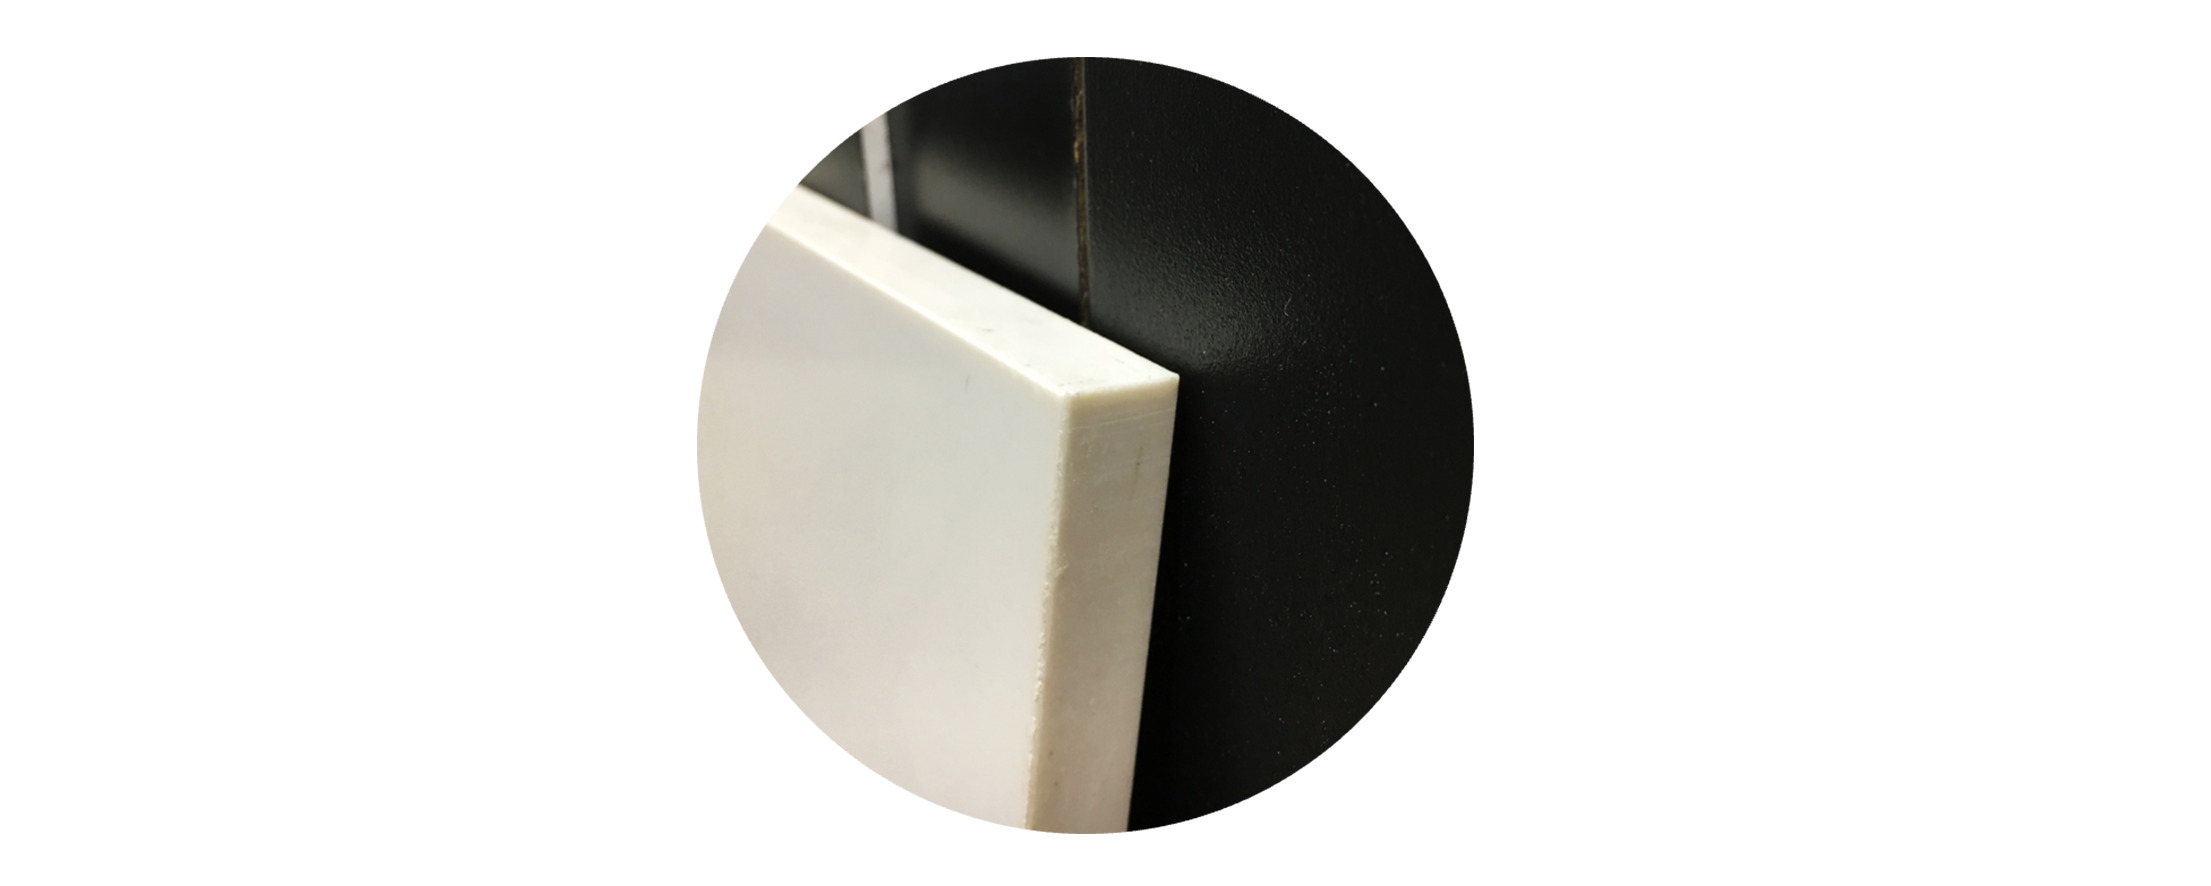
Left: Standard quality tile with print lines / Right: Good quality tile
Another easy way to check the quality of the print is to check whether there are print lines. Print lines happen from blocked print nozzle heads and especially when printed only in a few layers those print lines will remain quite obvious. Good quality tiles shouldn’t have any. Here you can see similar looking tile with and without print lines, the difference speaks for itself.
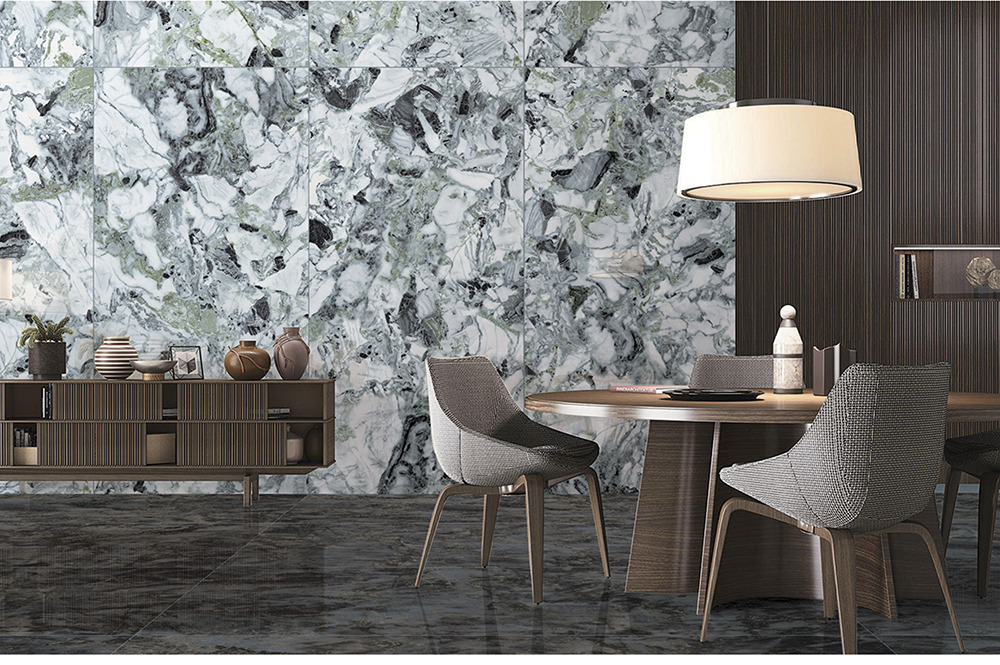
WHITE MARBLE LOOKING TILES
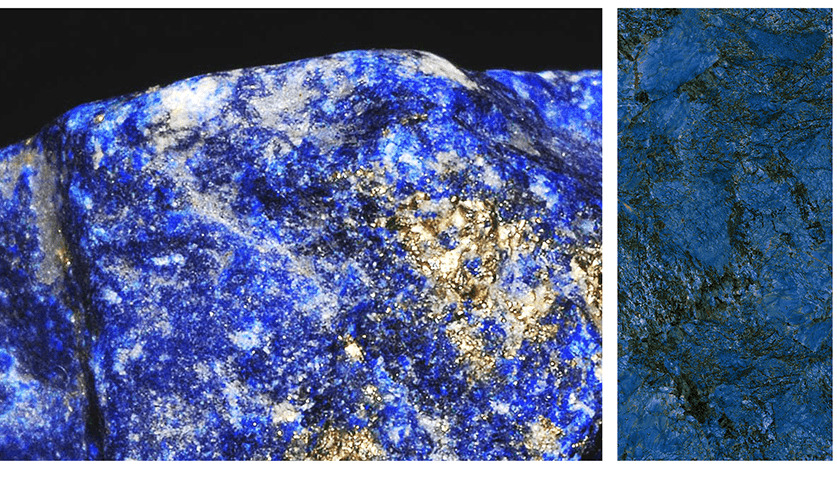
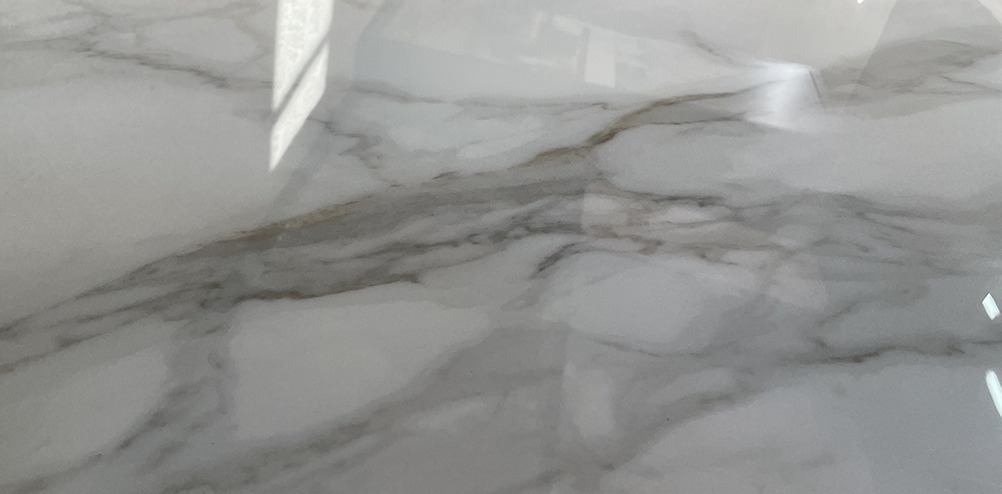
When choosing white marble look porcelain tiles there can be a big difference between good and a poor looking tile. One of them is the colour of the body of the tile, but we will cover that further. Please look at the plain white area of the tile. Like a real marble, it’s not just plain white, it has some tiny veins, it has some hues and different colour shades, so do high-end porcelain tiles. To look very close to real marble they are printed everywhere, including in plain areas.
Here we have an example of Kaolin Arabescato porcelain tile and real Arabescato Marble, as you can see there is almost no difference.
Also pay attention to a seamless transition between grey veins and plain areas of the tile, it should look as smooth as possible. While something like this presents as a poor copy and should be much cheaper.
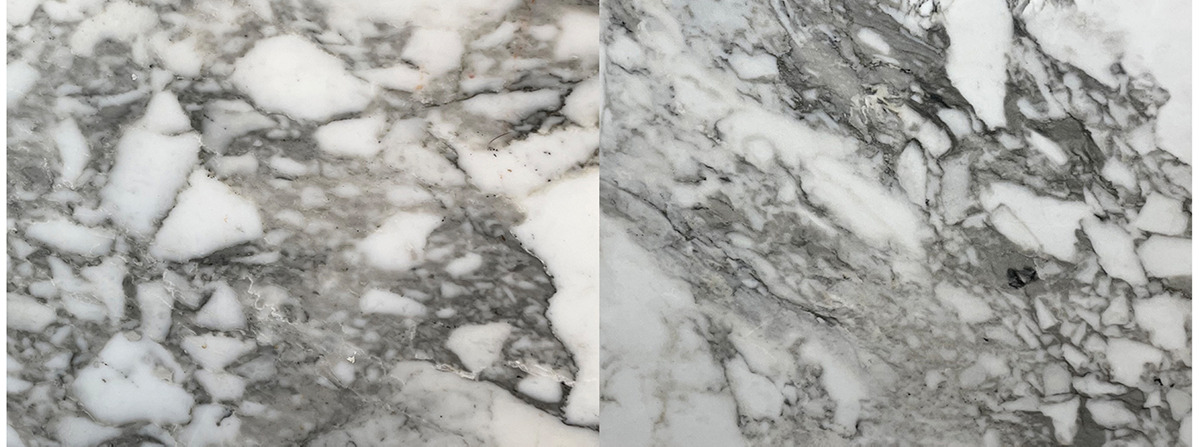
Left: Real Arabescato Marble / Right: Kaolin Arabescato Porcelain Tile
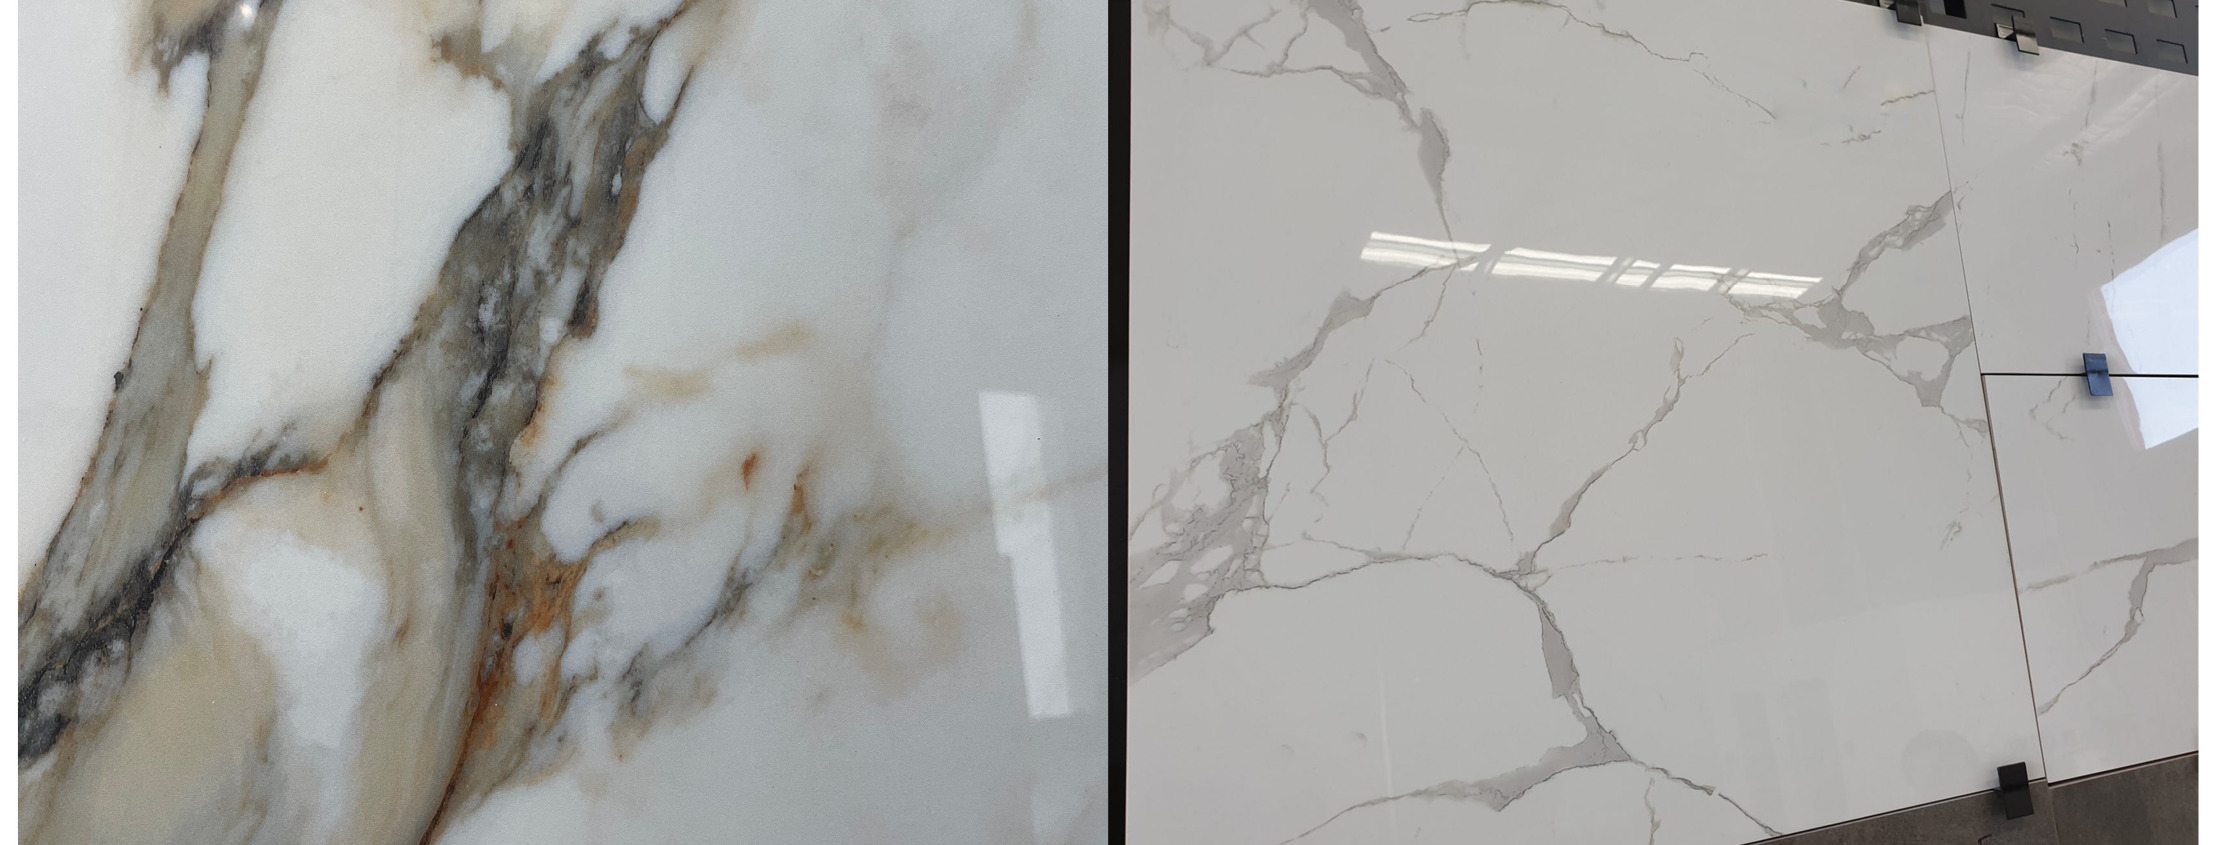
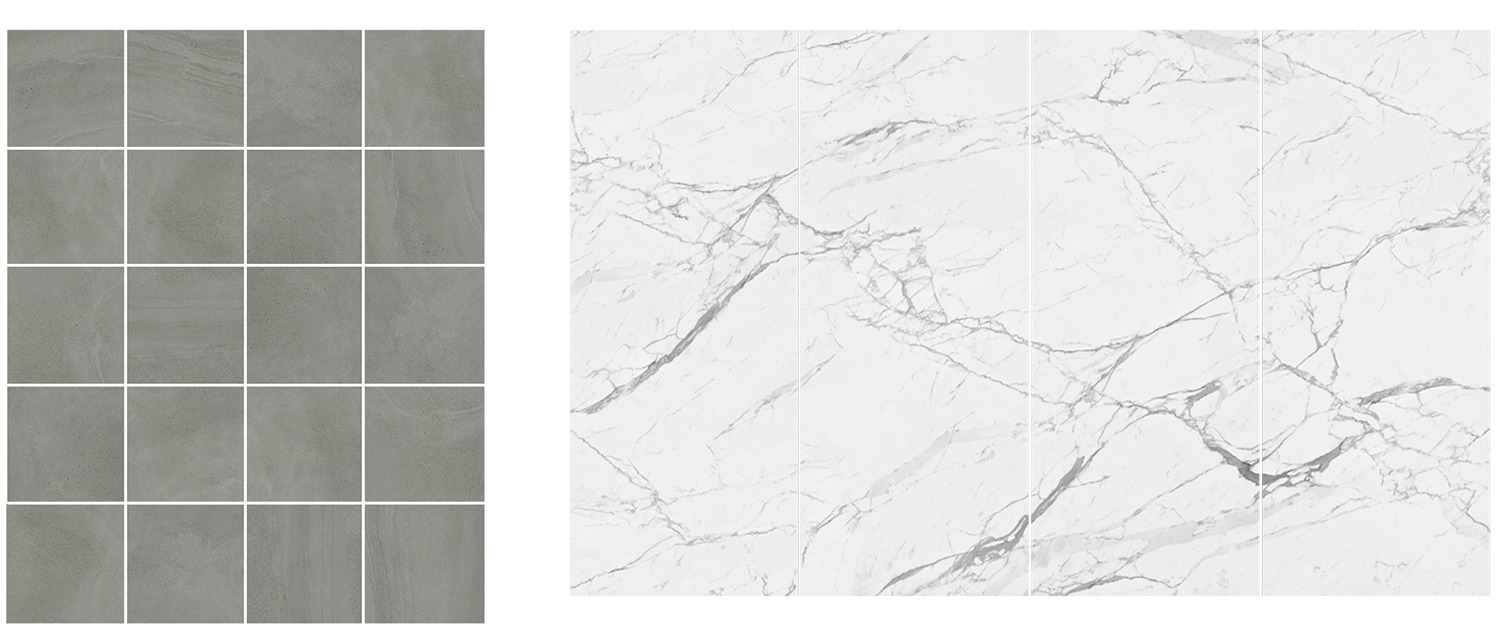
Left: Good Quality Marble Look Tile / Right: Standard Quality Marble Look Tile
PRESSED vs CUT-TO-SIZE TILES
A major difference in quality of your finished result will directly relate to, whether your tile is pressed to size (not to be confused with cushioned edge tiles) or cut to size. Pressed to size tile is superior in every single way, with cut to size tile might result in having at least one of more of the following problems. Some of them, are very easy to identify with a naked eye.
Pressed-to-size tiles are tiles that are pressed directly to the correct size. The edges at end of the process are rectified and polished. The sizes are true to the size advertised and edges are 90-degree bevelled and smooth.
Cut-to-size tiles are tiles that are pressed into larger format and then cut to the correct size at the end of the process. It is usually done to save the cost and there is no guarantee to be true to the advertised size.
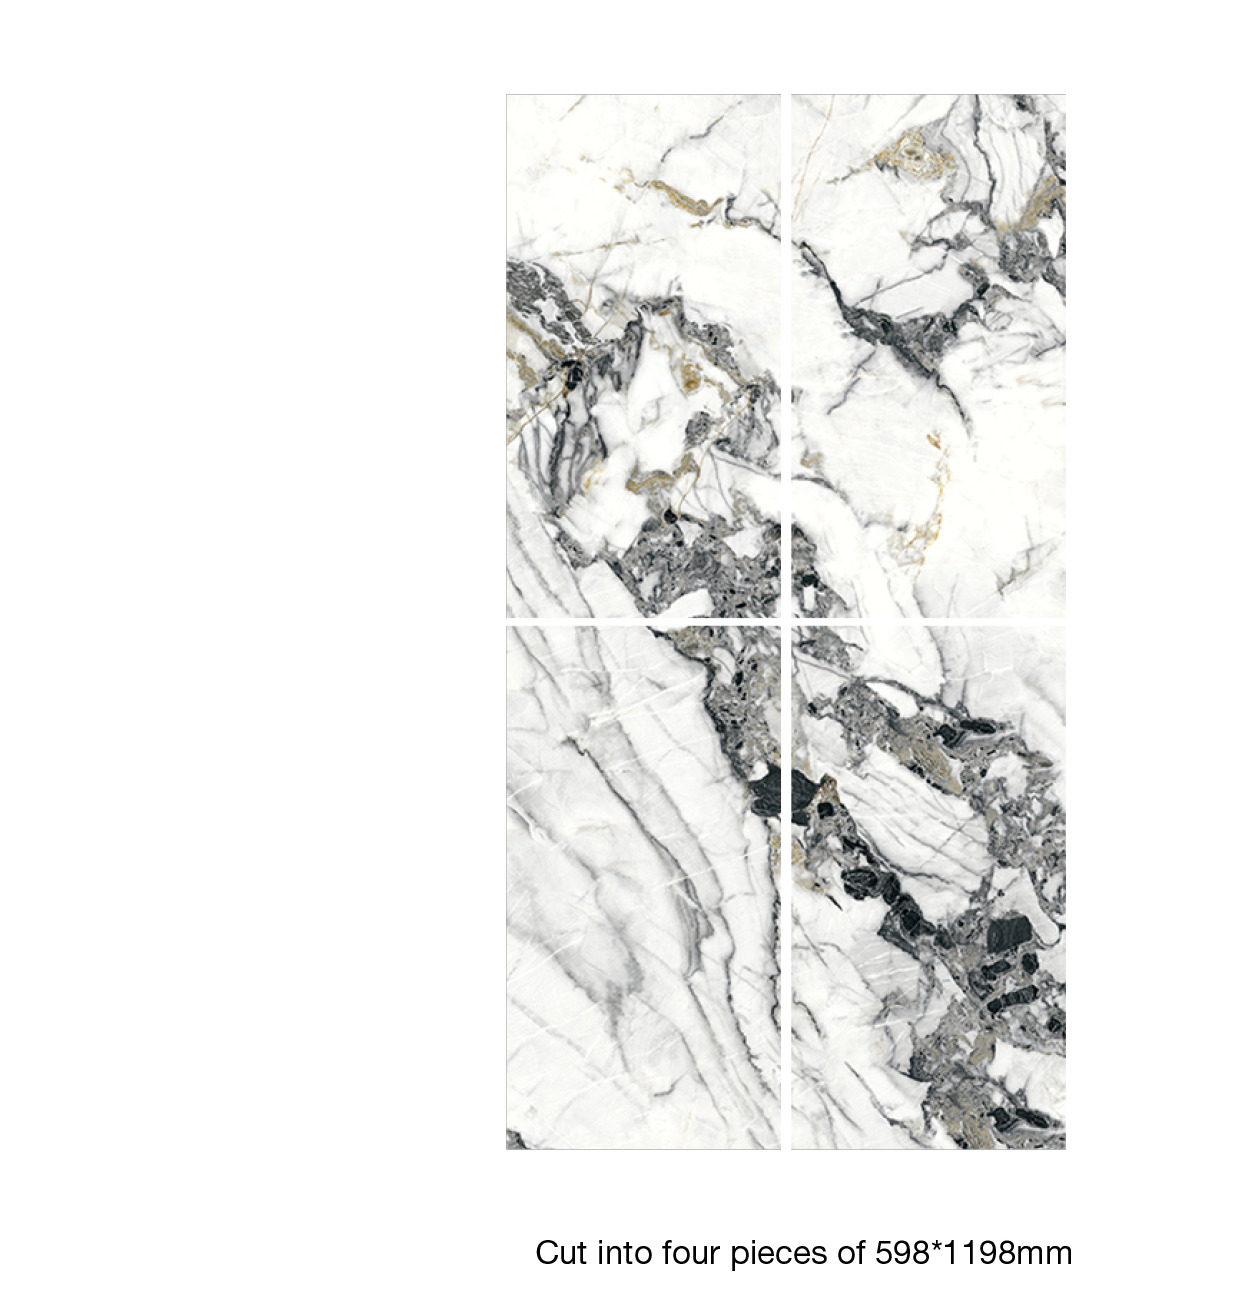

TRUE TO SIZE
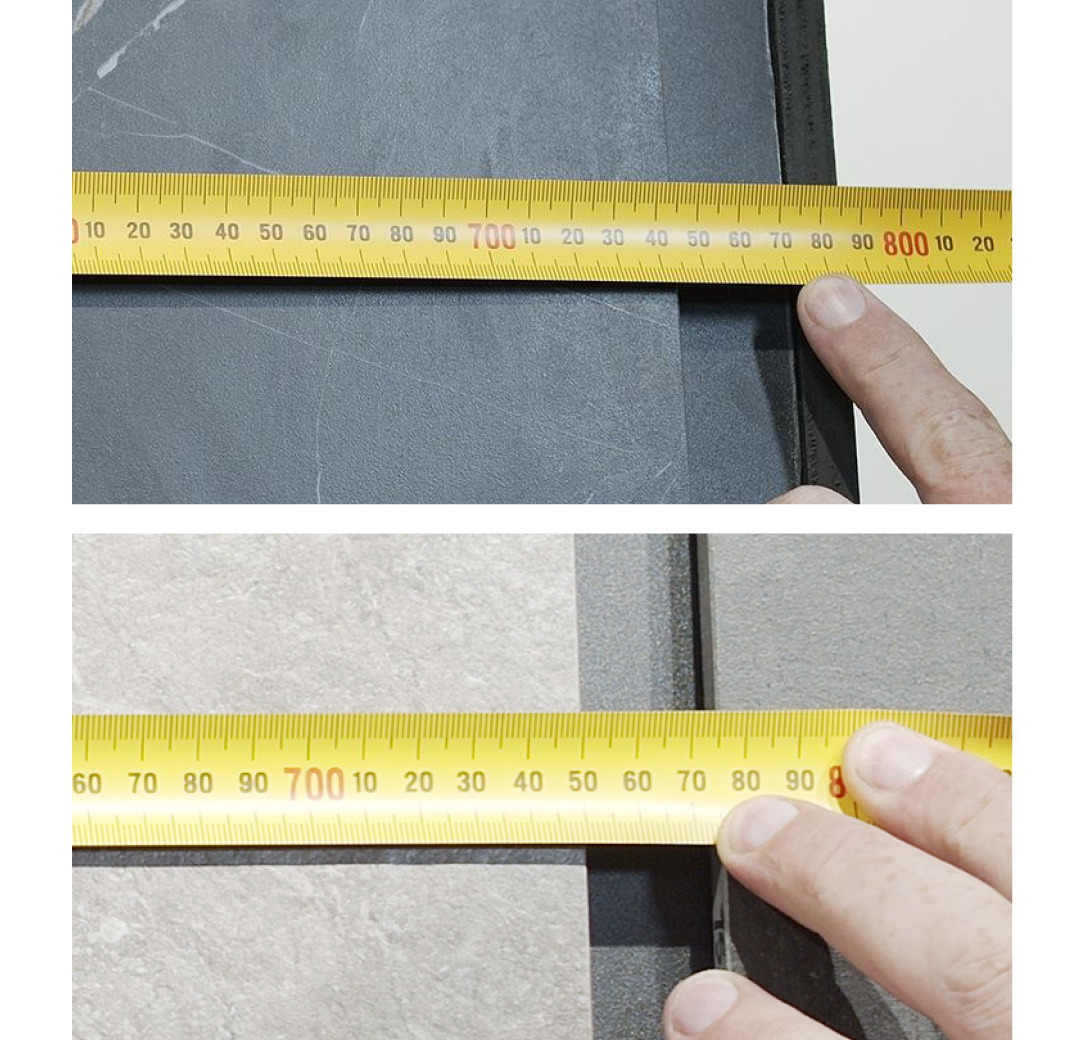
Up: Standard Quality Tile measuring 745mm / Down: Kaolin Tile measuring 750mm spot on
At Kaolin we are very proud of the fact all our tiles are pressed to size, It means they are “True to Size”. There is nothing more frustrating than ordering a tile that is advertised as 600×1200 or 750×1500 and then finding out it is 5mm smaller (595×1195 or 745×1495). Because that is what happens with cut-to-size tiles. This becomes even more so when utilising more than one tile in the same area and trying to get the grout lines to line up.
It is quite common when using rectified tiles there is quite often a size difference, even from the same manufacturer. Why? For economic reasons, most tiles today are manufactured in a larger size and then cut down to multiple smaller sizes to provide the end user options. Product lost to the cutting process or setup error/variations often leads to tiles smaller than advertised and very often different in size to other tiles, even from the same manufacturer. Kaolin Don’t cut tiles to size. Every tile is pressed to the intended size and you will always receive a tile true to size.
BOWING
There are a lot of issues with tiles as sizes get bigger with bowing or “lipping”. All tiles are allowed a certain amount of bowing in manufacturing and are still deemed to be 1st quality by International and Australian standards. This bowing can be up to 0.5% or 2mm either way and still meet standards. With one tile bowing concave and the other convex you can experience up to 4mm difference in height of 2 tiles laid side by side. (easiest way to see this is putting 2 tiles face to face or back to back. This will highlight the bowing effect and quickly show you if the tiles you have are flat).
At Kaolin our tolerances are a lot stricter. Our maximum allowance on our 900×1800 tiles is only 0.02% variation or 0.3mm. This means it is a lot easier for you tiler to achieve that perfectly flat floor with no lipping or high edges to trip on or catch dirt.
We are so confident in our tiles flatness we allow grout joints down to 0.5mm when laying stackbond and even recommend bricklaying or a 50% offset with joints as small as 1.5mm.
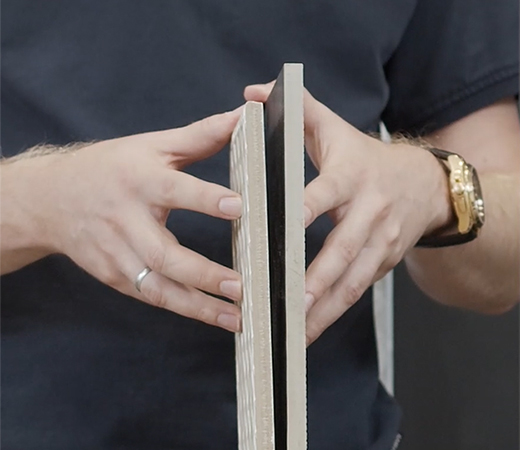
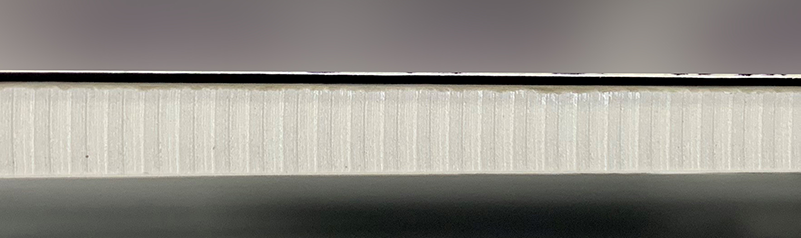
Bowing Tiles
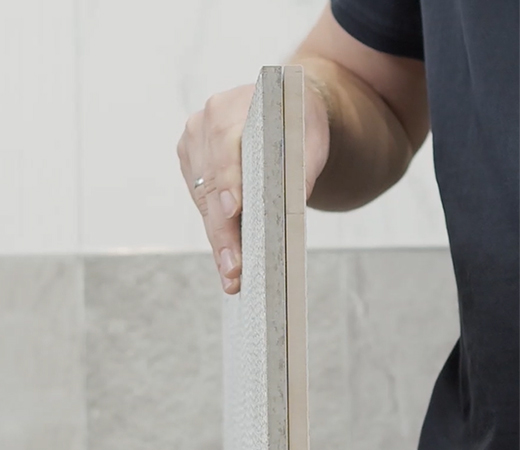
Left: Standard quality tiles / Right: Kaolin Tiles with no lippage
BEVELLED/CHAMFOURED EDGES
Another downside of cutting tiles to size is that the edge isn’t always truly rectified. When cutting tiles to size with a diamond blade the tile will have little chips from the cutting process. To remove these small chips manufacturers will often put a small bevelled edge on the tile to create a smooth edge. This creates another issue by making grout joints larger than the spacer used. Quite often you will also see sawmarks on the edge, resulting, again in a bigger undesirable grout joint. With a tile with a small 0.5mm bevel, add in a 1.5mm spacer and you end up with un undesirable 2.5mm grout joint. There is also the issue of flaking grout as the strength in the grout joint is quite weak when it is only as deep as the small bevel allows.
Kaolin tiles are a true 90 degree bevel with no chamfouring/bevelling. We hone/polish the edge of our tiles which gives a sharp/clean joint that is true to the spacer size. Use a 1.5mm spacer and the joint will be 1.5mm. Use a 0.5mm spacer and you will have the smallest grout joint of any tile currently on the market. Only Kaolin offers the range of tiles suitable for seamless joint tiling.
Sawmarks
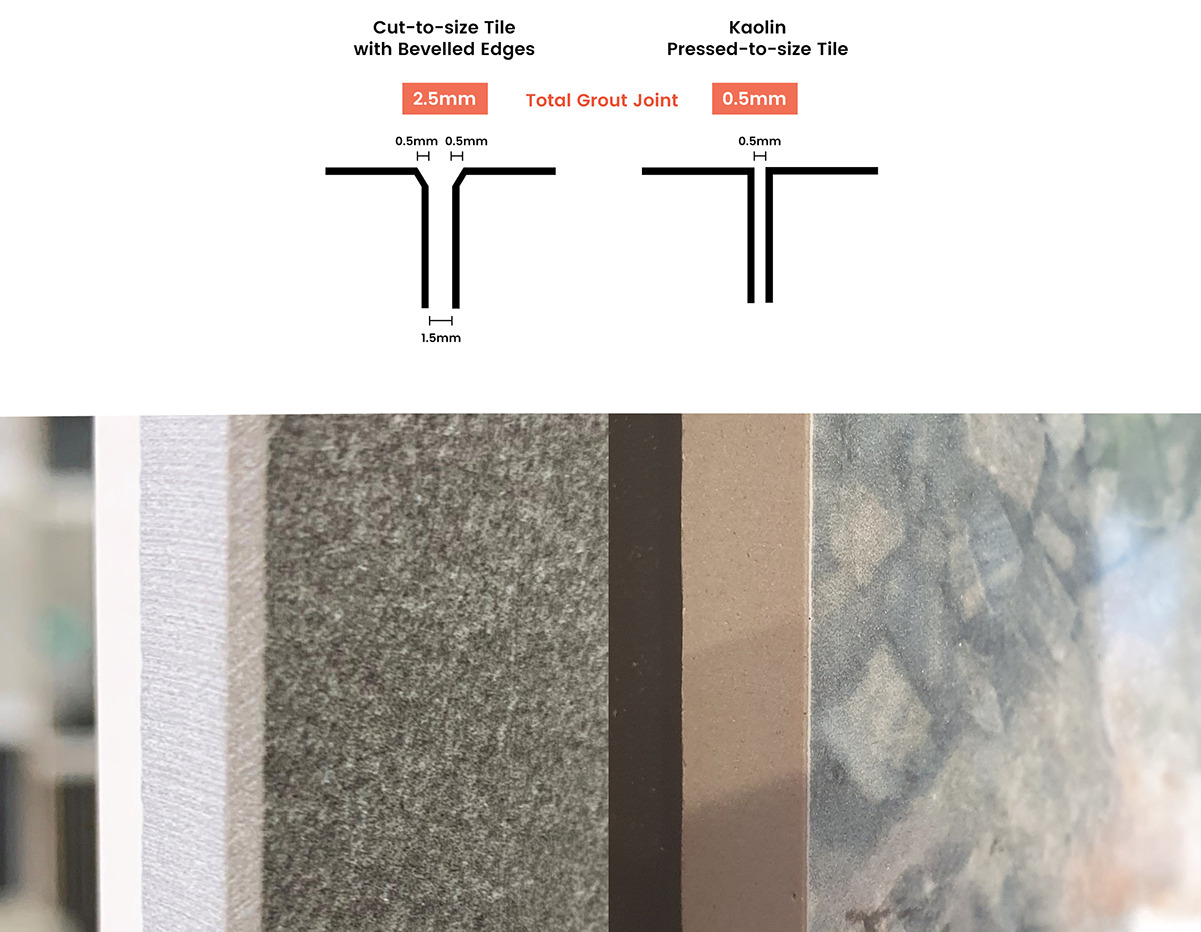
Left: Bevelled Edge / Right: True Rectified Edge
Another downside of cutting tiles to size is that the edge isn’t always truly rectified. When cutting tiles to size with a diamond blade the tile will have little chips from the cutting process. To remove these small chips manufacturers will often put a small bevelled edge on the tile to create a smooth edge. This creates another issue by making grout joints larger than the spacer used. Quite often you will also see sawmarks on the edge, resulting, again in a bigger undesirable grout joint. With a tile with a small 0.5mm bevel, add in a 1.5mm spacer and you end up with un undesirable 2.5mm grout joint. There is also the issue of flaking grout as the strength in the grout joint is quite weak when it is only as deep as the small bevel allows.
Kaolin tiles are a true 90 degree bevel with no chamfouring/bevelling. We hone/polish the edge of our tiles which gives a sharp/clean joint that is true to the spacer size. Use a 1.5mm spacer and the joint will be 1.5mm. Use a 0.5mm spacer and you will have the smallest grout joint of any tile currently on the market. Only Kaolin offers the range of tiles suitable for seamless joint tiling.
Sawmarks
Left: Bevelled Edge / Right: True Rectified Edge
MINIMAL GROUT JOINT
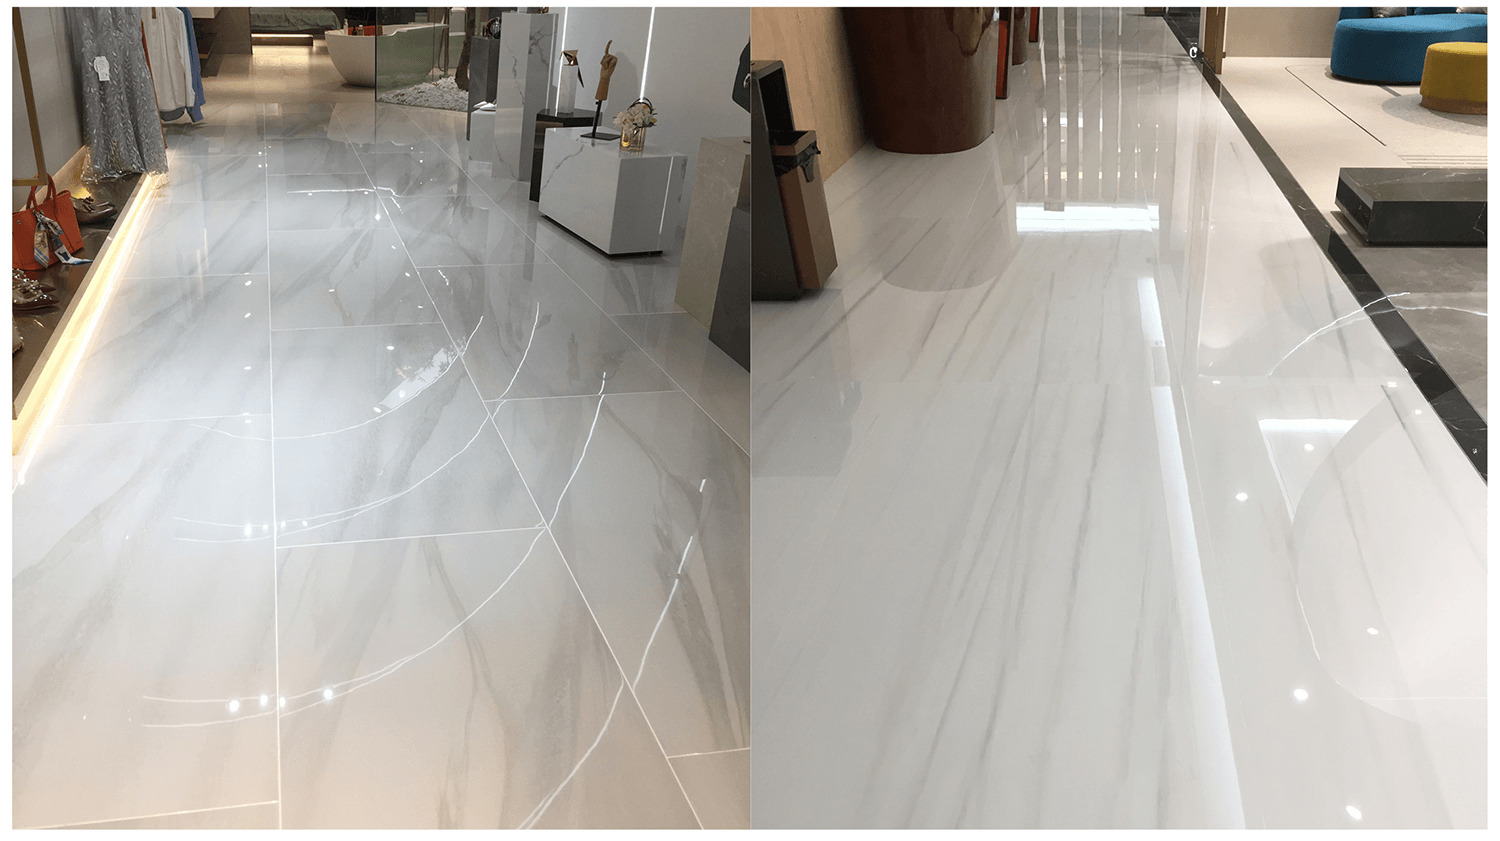
Left: Normal Tiling / Right: Kaolin Seamless Joint Tiling
Nothing is worse when you buy beautiful tiles and then you get a big, large grout joint. Obviously, it is more depending on the quality of tiler and the right choice of the colour for the grout joint.
SEAMLESS JOINT
Always ask what size of joint would a manufacturer advise, as that would basically tell you their confidence in their product.
At Kaolin we have tiles where we advise “Seamless Joint Tiling” of only 0.5mm. Because that is how confident and proud we are that our product is technically the best on the market. Please refer to our White Paper about “Seamless Joint Tiling Technology” to discover how only Kaolin Tiles can achieve such a small grout joint.
TILE BODY
By looking at the tile body, the biscuit you can get lots of information about the quality as well. Let me go through with you.
IMPURE BODY
You can see impurities and a biscuit with different colours. Usually, it happens on cheaper tiles with lesser quality of raw materials. Pure clay is naturally white. When biscuit is offwhite, beige, brown, these are impurities still left in the clay. They can affect the physical properties of the tile.
You can see impurities and a biscuit with different colours. Usually, it happens on cheaper tiles with lesser quality of raw materials. Pure clay is naturally white. When biscuit is offwhite, beige, brown, these are impurities still left in the clay. They can affect the physical properties of the tile.
COLOUR BODY
It is pretty standard body. Important to notice and to make sure is that the colour of the body/biscuit matches the colour of the surface. The difference between colour body and dirty biscuit is that the colour body is very consistent in colour. It starts with pure clay and is coloured with oxides Nothing looks worse if you choose white marble tile, but the body end up brown. Or for the black tile, it should have a black body too.
It is pretty standard body. Important to notice and to make sure is that the colour of the body/biscuit matches the colour of the surface. The difference between colour body and dirty biscuit is that the colour body is very consistent in colour. It starts with pure clay and is coloured with oxides Nothing looks worse if you choose white marble tile, but the body end up brown. Or for the black tile, it should have a black body too.
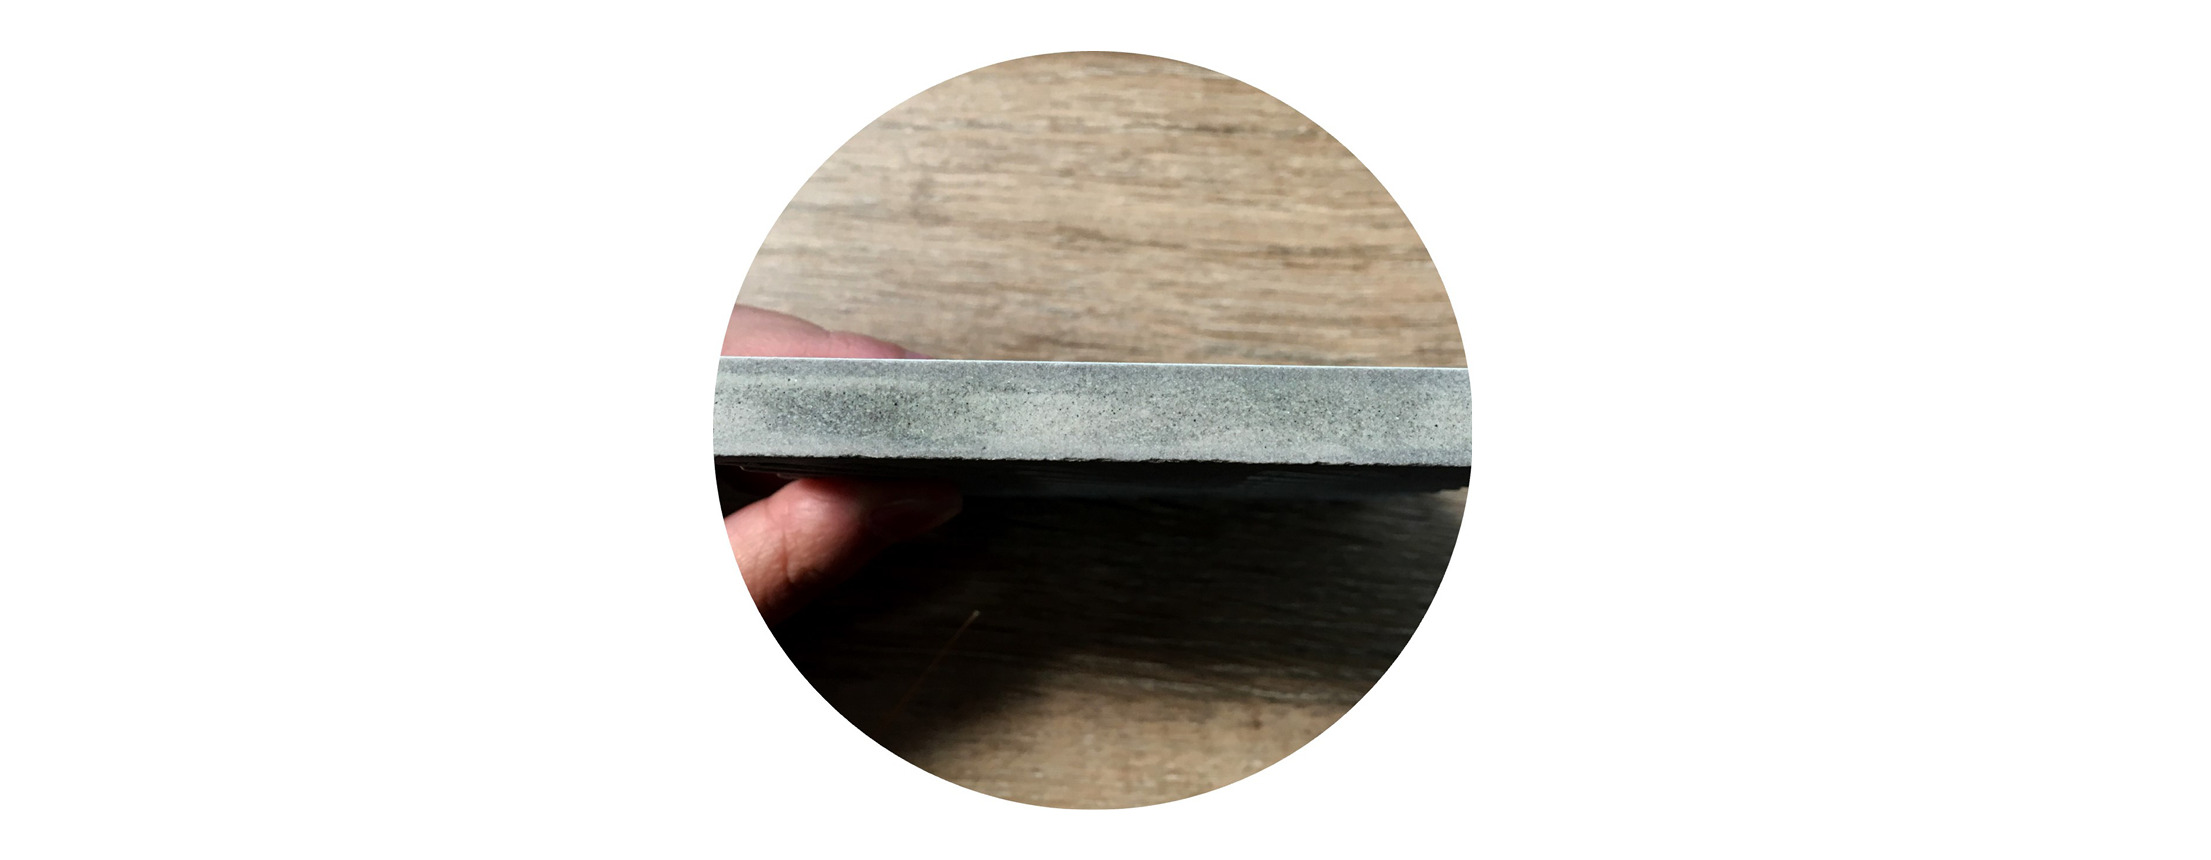
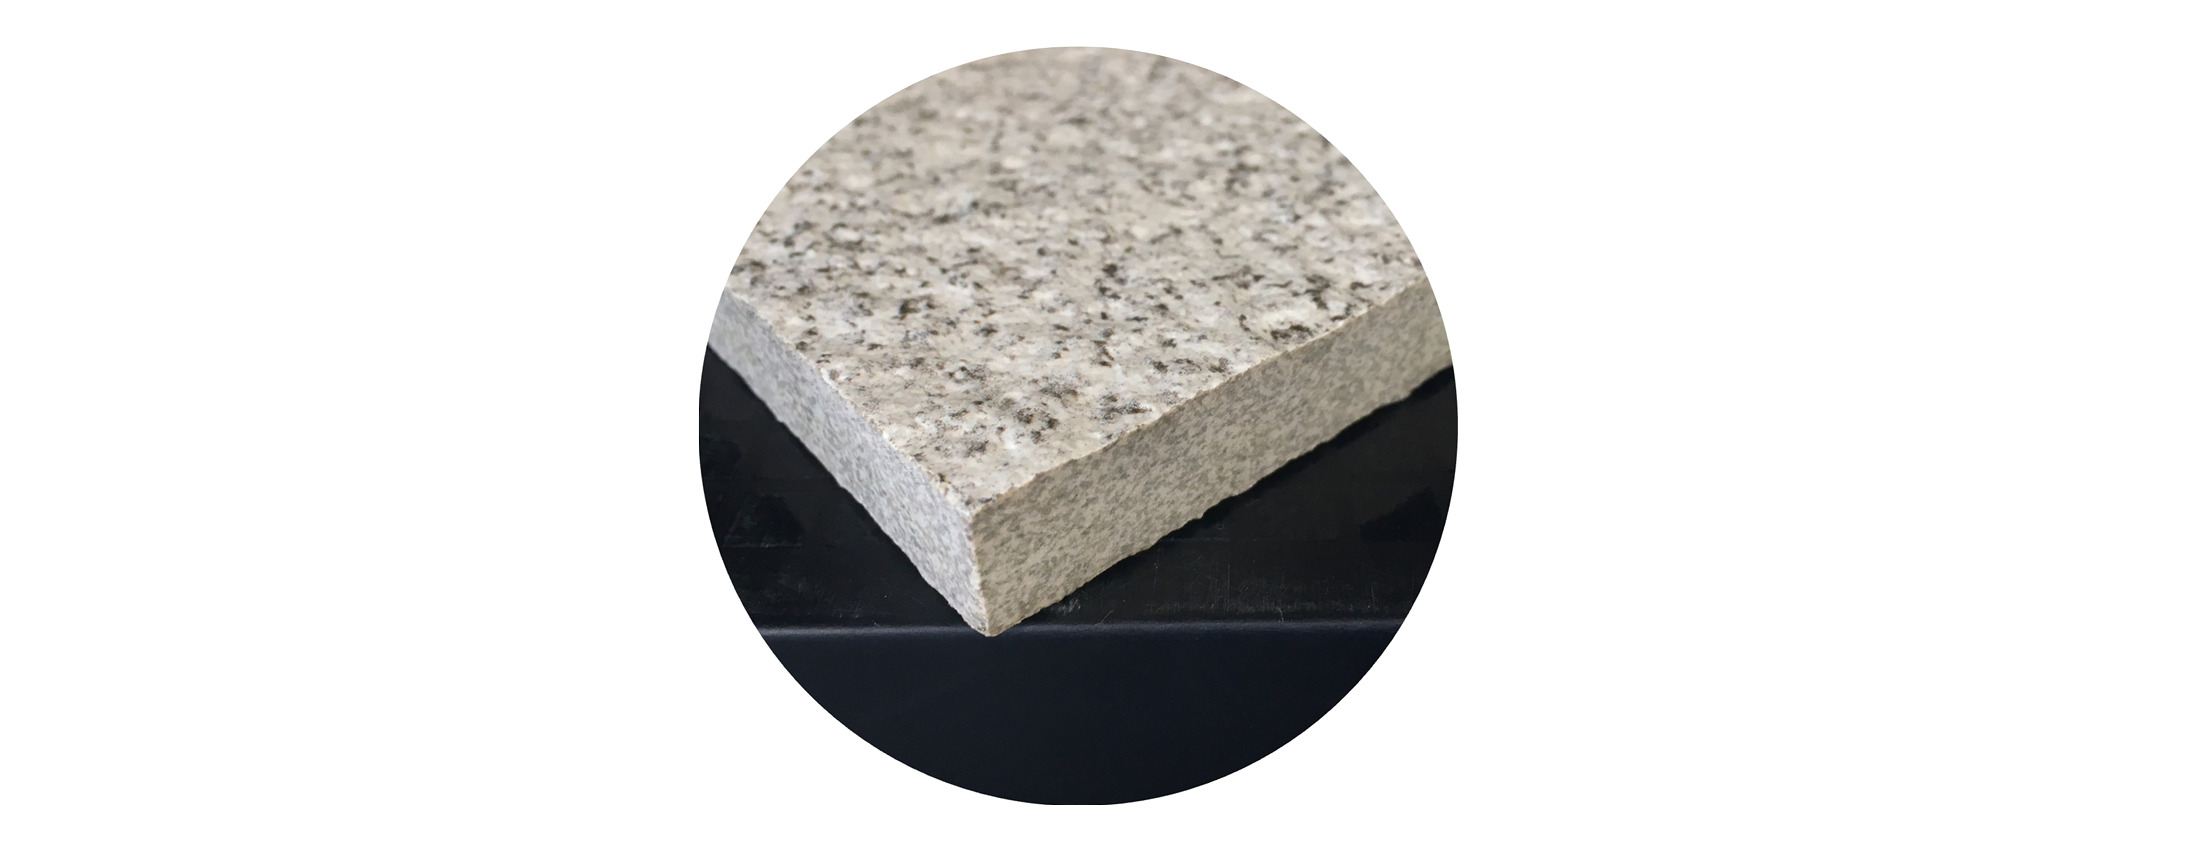
SALT AND PEPPER
It is a good quality body, that looks more natural, especially for certain looks, such as for example granite outdoor pavers when an edge may be exposed.
It is a good quality body, that looks more natural, especially for certain looks, such as for example granite outdoor pavers when an edge may be exposed.
FULL BODY
It is a high quality body, trying to achieve veins in the body and imitating the surface colours as well. The veins while, providing a more natural look, are not aligned with the surface print.
It is a high quality body, trying to achieve veins in the body and imitating the surface colours as well. The veins while, providing a more natural look, are not aligned with the surface print.
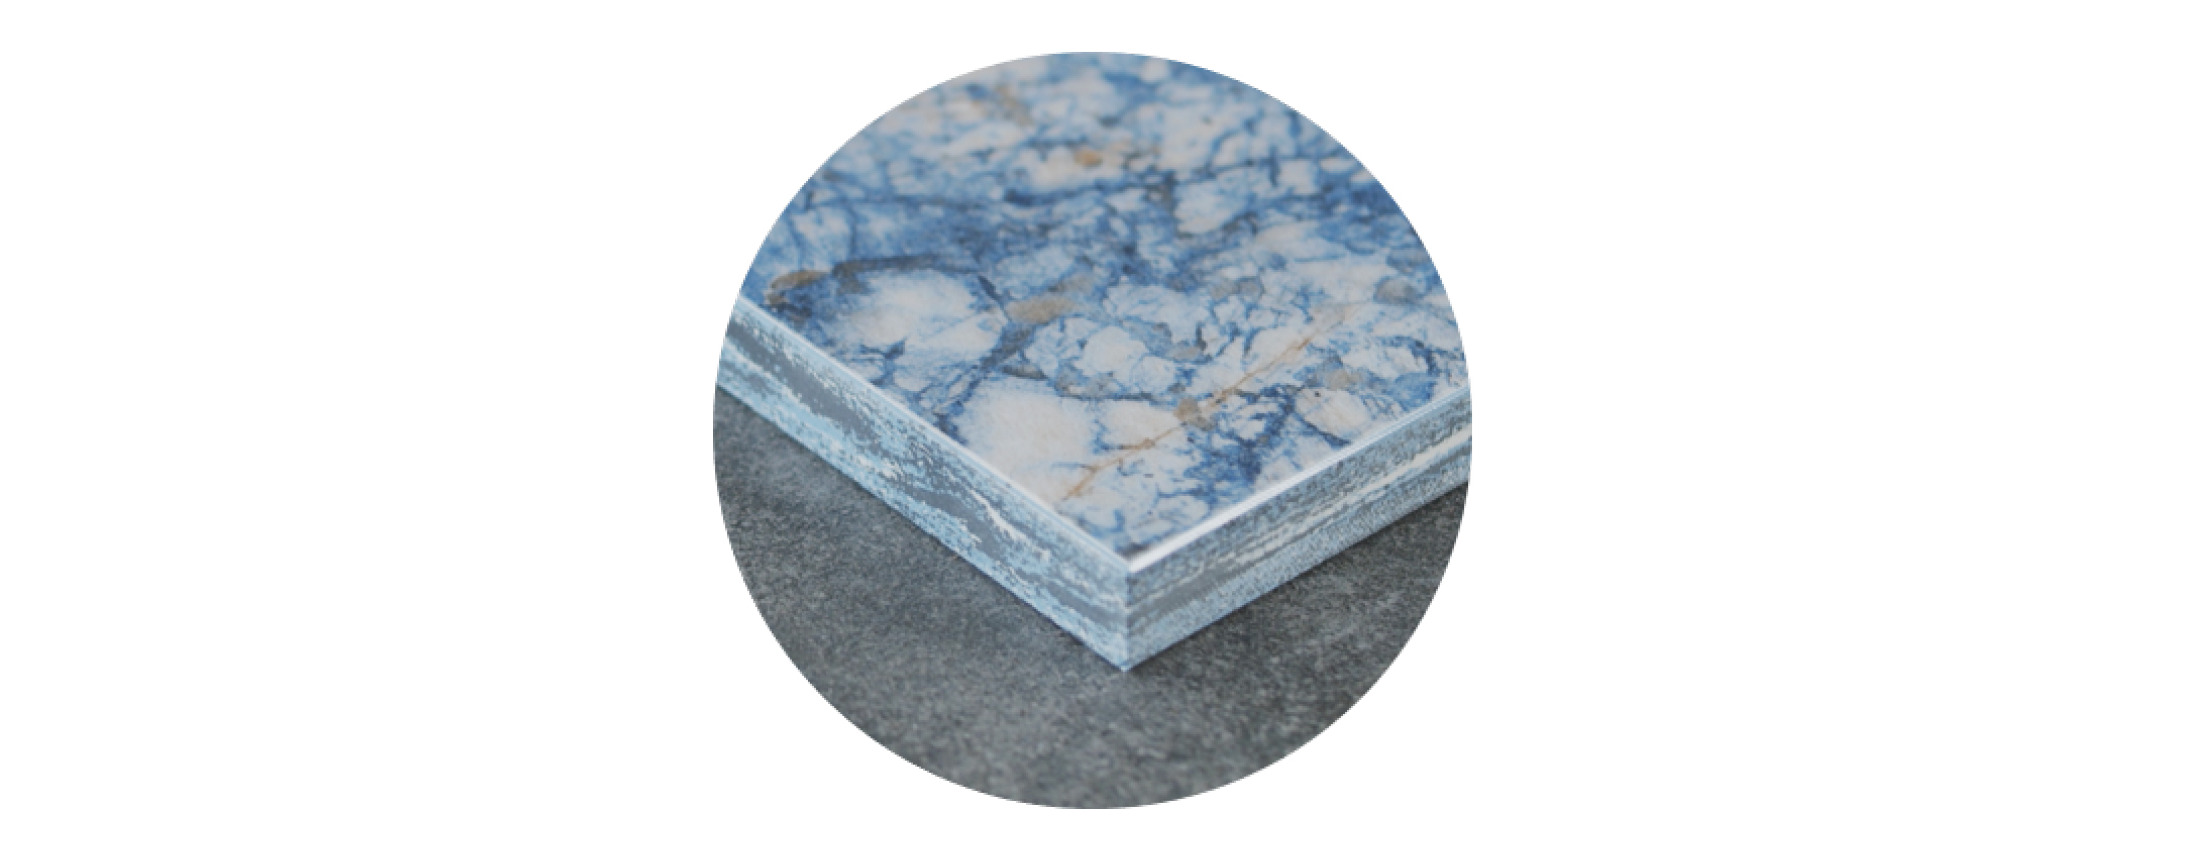
NATURAL VEIN BODY
The latest technology, so far only possible by Kaolin and a few other brands, prints the vein through the body. This just looks like natural stone, doesn’t matter what you do, the colour and veins will always be there.
The latest technology, so far only possible by Kaolin and a few other brands, prints the vein through the body. This just looks like natural stone, doesn’t matter what you do, the colour and veins will always be there.
SURFACE FINISH
There are plenty of different surface finishes available for tiles. Each of them has its own strength and weakness and each client has different choices and preferences. But, let us explain, where to look for some of those surface finishes.
POLISHED
Polished tiles are like diamonds, they have to be polished up to a high level to provide you with a strong depth, because that is their major strength. Only by using high quality glaze and specialized polishing equipment that high depth can be achieved. For polished tiles, check the luminosity, for better quality polished tiles it should be higher than 90% or even 95%.
Polished tiles are like diamonds, they have to be polished up to a high level to provide you with a strong depth, because that is their major strength. Only by using high quality glaze and specialized polishing equipment that high depth can be achieved. For polished tiles, check the luminosity, for better quality polished tiles it should be higher than 90% or even 95%.
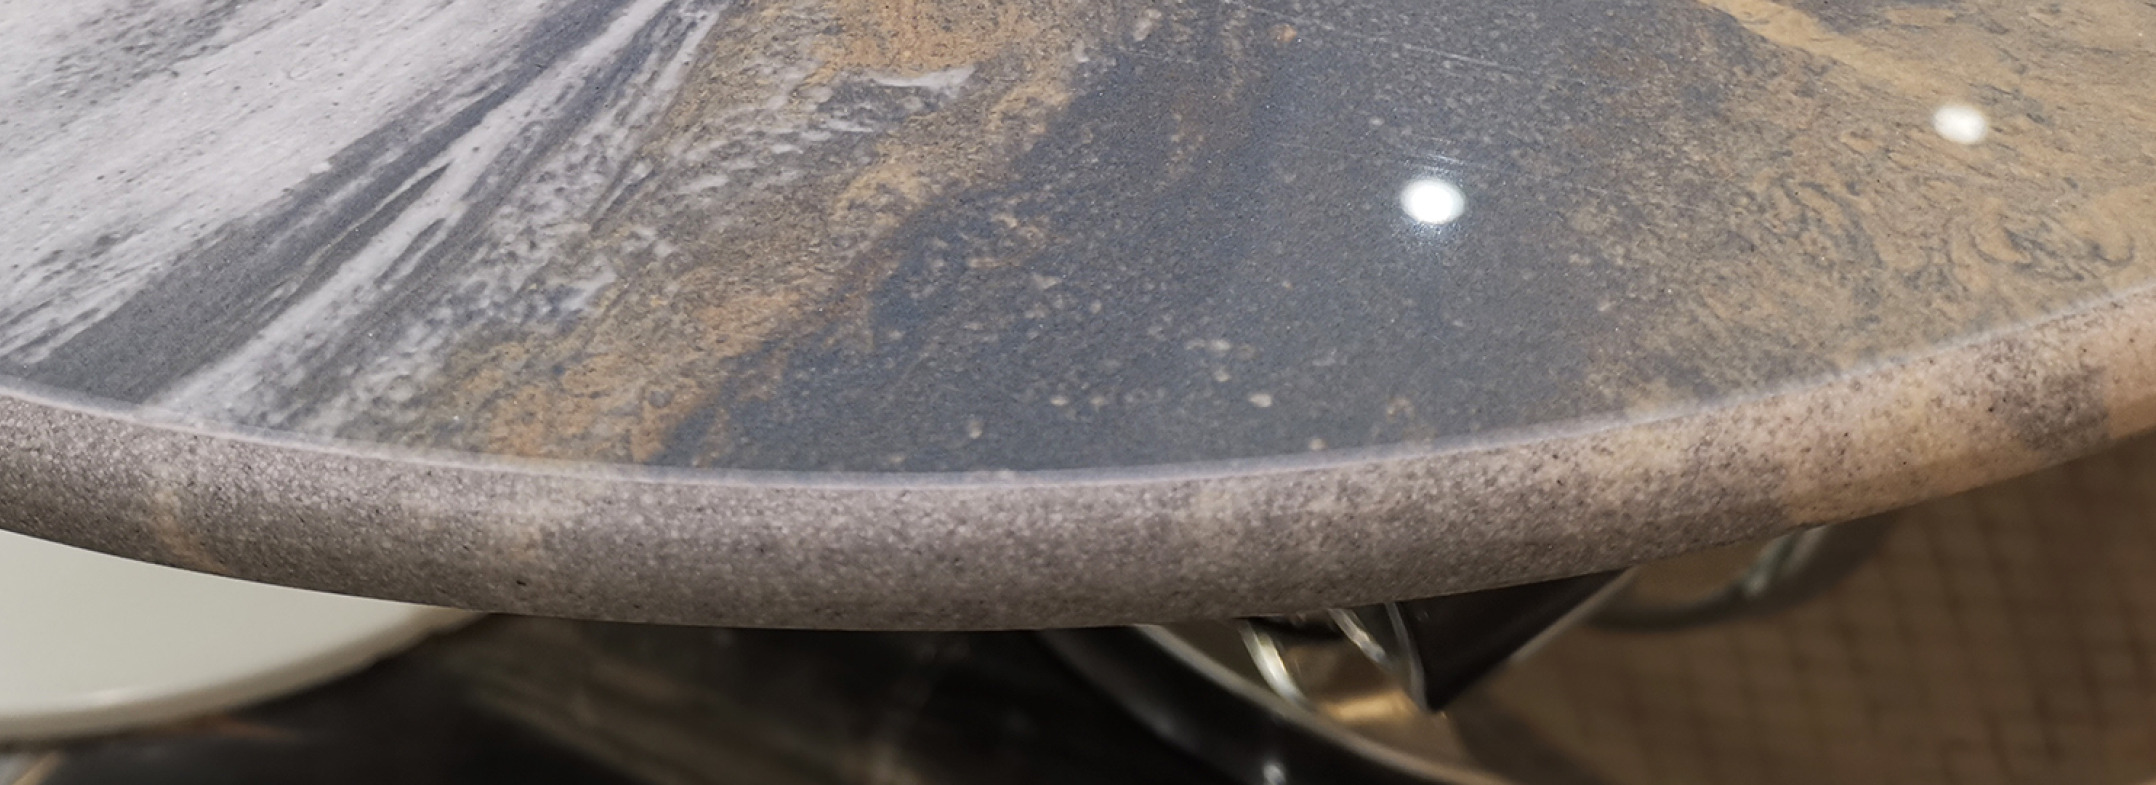
GLAZE REFLECTION
With a polished surface finish, it would be important to choose tiles with a superior glaze and polished finish with no imperfections. While a Perfect polished finish adds another level of depth to the tile and can look crystal clear, an inferior glaze or poor polishing process will highlight any flaws in polished tiles and can result in one or more of the following issues. How to identify them? You can shine a light at the tile and observe its reflections and how smooth it is. Imperfect glaze might show some bubbles and in a worse scenario you can see the print being almost scrapped from the tile edge. That can be caused by a low thickness of glaze, poor quality glaze or the uneven flatness of the tile surface.

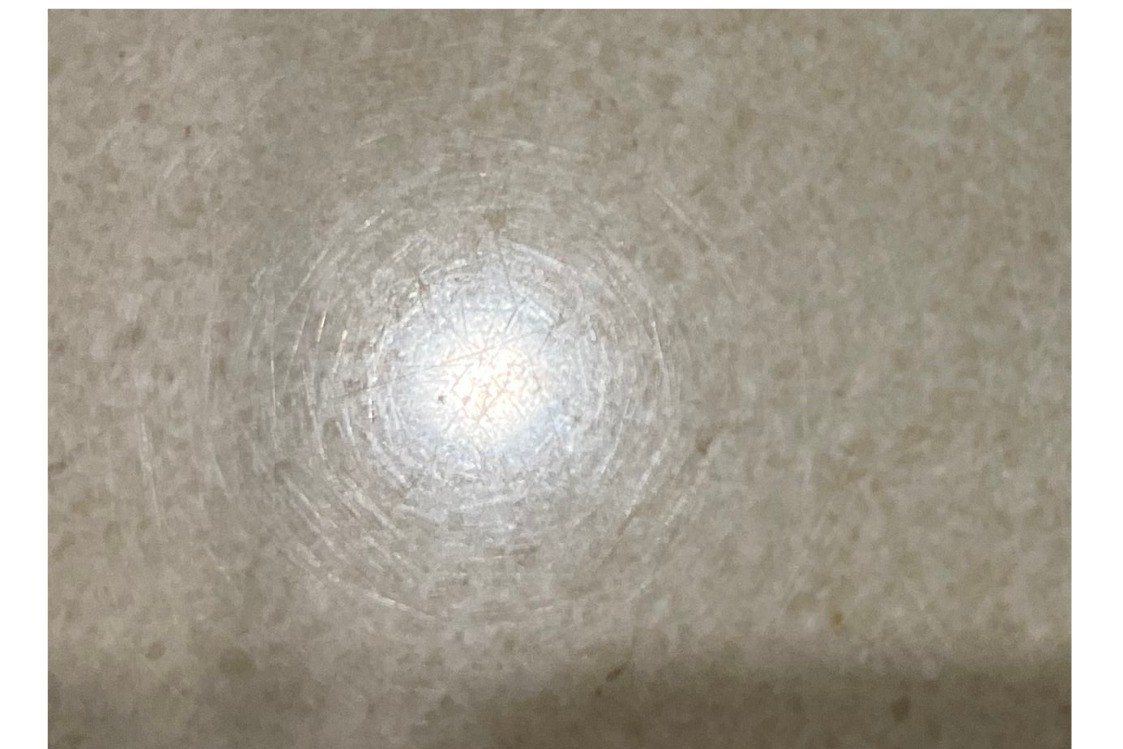
SWIRL MARKS
Swirl marks are a sign of poor quality or worn polishing heads and can take away from the desired look. This can be more prevalent in honed finished tiles.
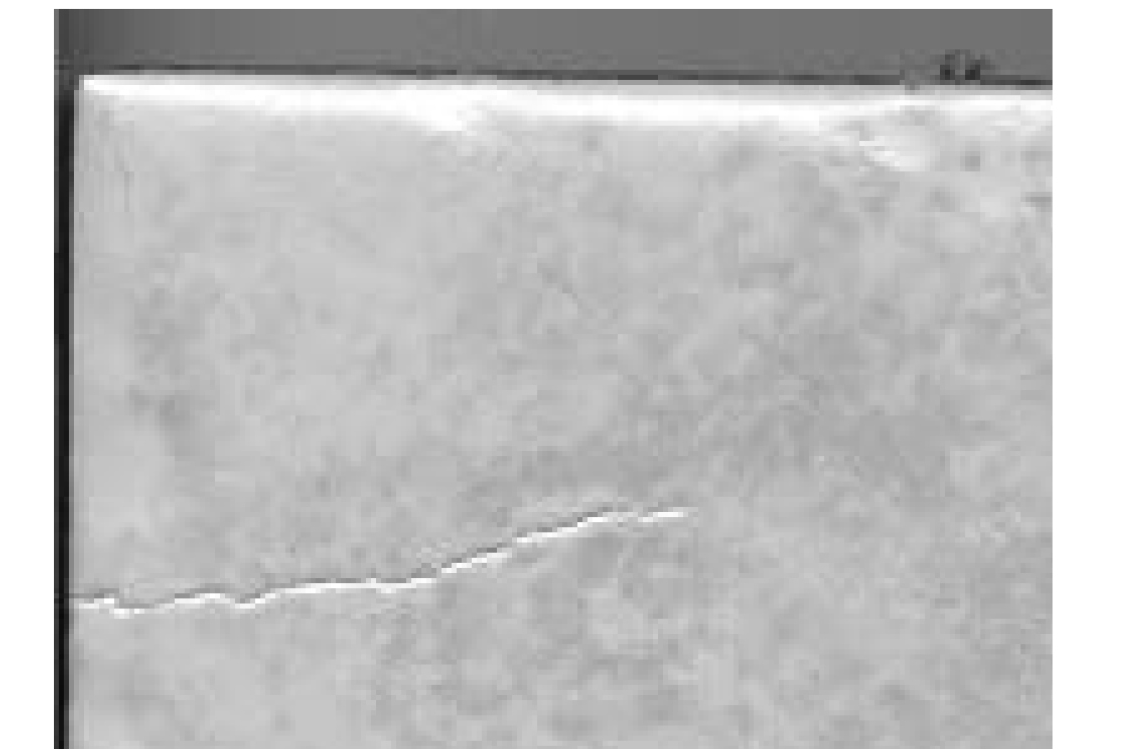
CRACK IN THE GLAZE
Another imperfection can be a crack in the tile glazing.
HONED
Major strength of honed finish, it is its warmth, it is not as shiny as gloss, but it is also not as cold as matt. The degree of luminosity should be around the human body temperature of 36%, anything between 29% to 50% can be considered as honed finish.

Major strength of honed finish, it is its warmth, it is not as shiny as gloss, but it is also not as cold as matt. The degree of luminosity should be around the human body temperature of 36%, anything between 29% to 50% can be considered as honed finish.
MATTE
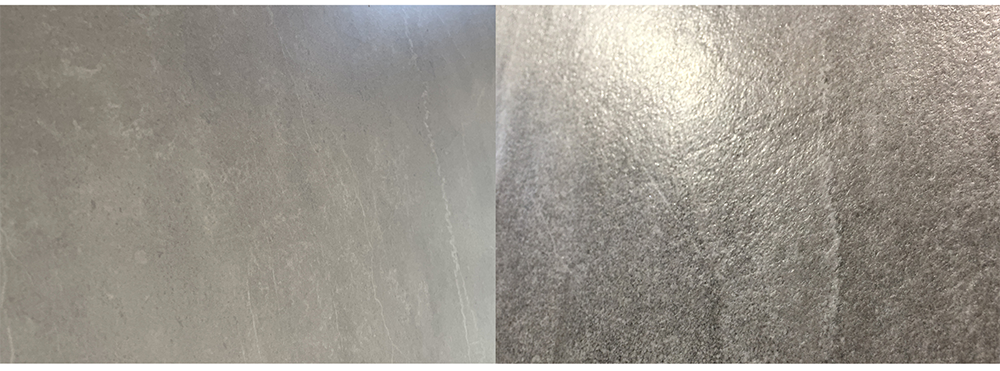
Left: Smooth Matte / Right: Textured Matte
Matte finish can be very flat and smooth as well as having a texture or leathered finish, look for texture as that give an extra real effect, and take a look closer to the new leathered finish, where texture aligns with printed veins.
Left: Smooth Matte / Right: Textured Matte
Matte finish can be very flat and smooth as well as having a texture or leathered finish, look for texture as that give an extra real effect, and take a look closer to the new leathered finish, where texture aligns with printed veins.
LEATHERED FINISH
Through the latest printing technology, we are able to closely replicate the fine veins and textures normally only seen in actual marble slabs, precisely aligned with the pattern/print it gives the look of real leathered marble adding an additional tactile element to a traditionally visual only surface.
Through the latest printing technology, we are able to closely replicate the fine veins and textures normally only seen in actual marble slabs, precisely aligned with the pattern/print it gives the look of real leathered marble adding an additional tactile element to a traditionally visual only surface.
FACES
It is important to know the amount of unique faces for each tile, so you don’t get repetitions very often. But we would like to emphasize the word “unique” as there are plenty of ways for a tile technically to have lots of faces, but still look repetitive.
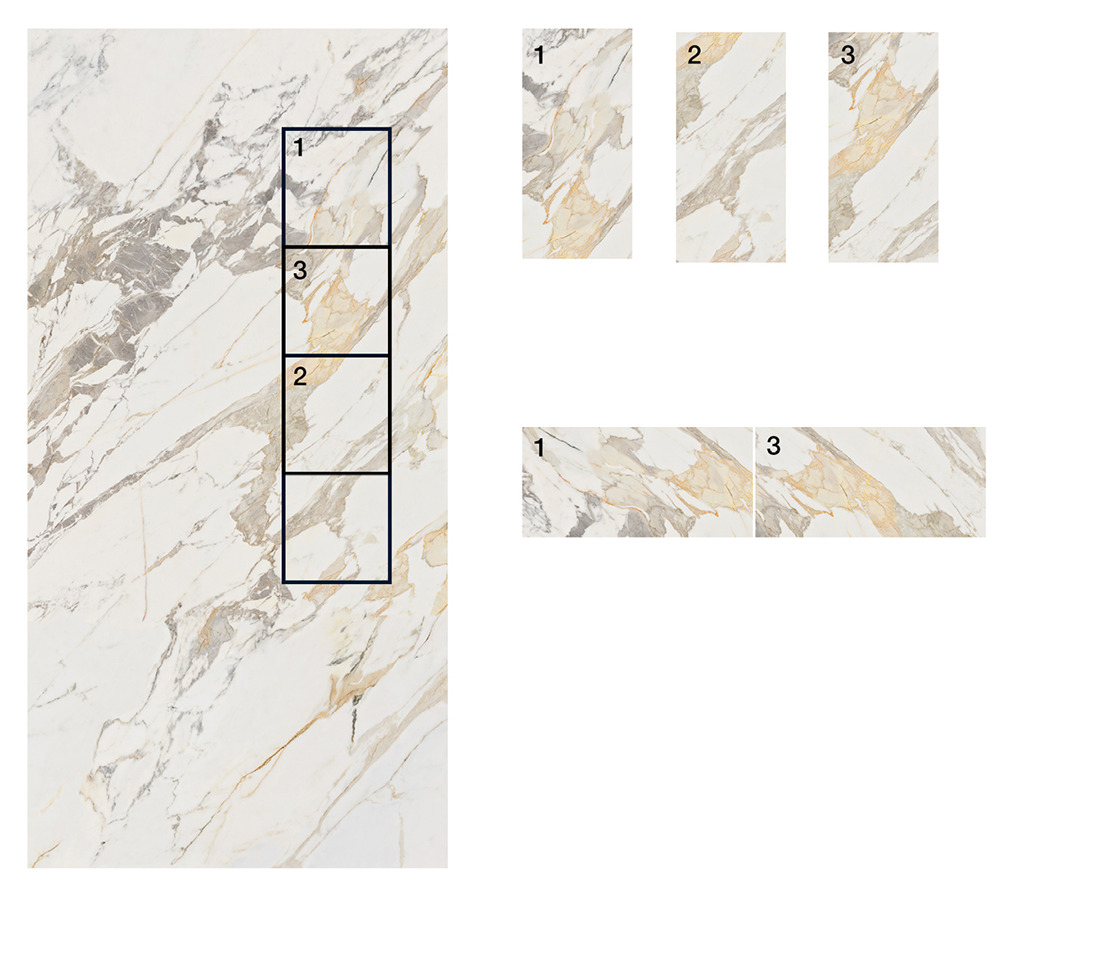
First of all, some manufacturers would mirror the same face like in a picture on the right. It is nice to have a bookmatch set, but not if that is just two random faces, if you lay them next to each other, it will look repetitive.
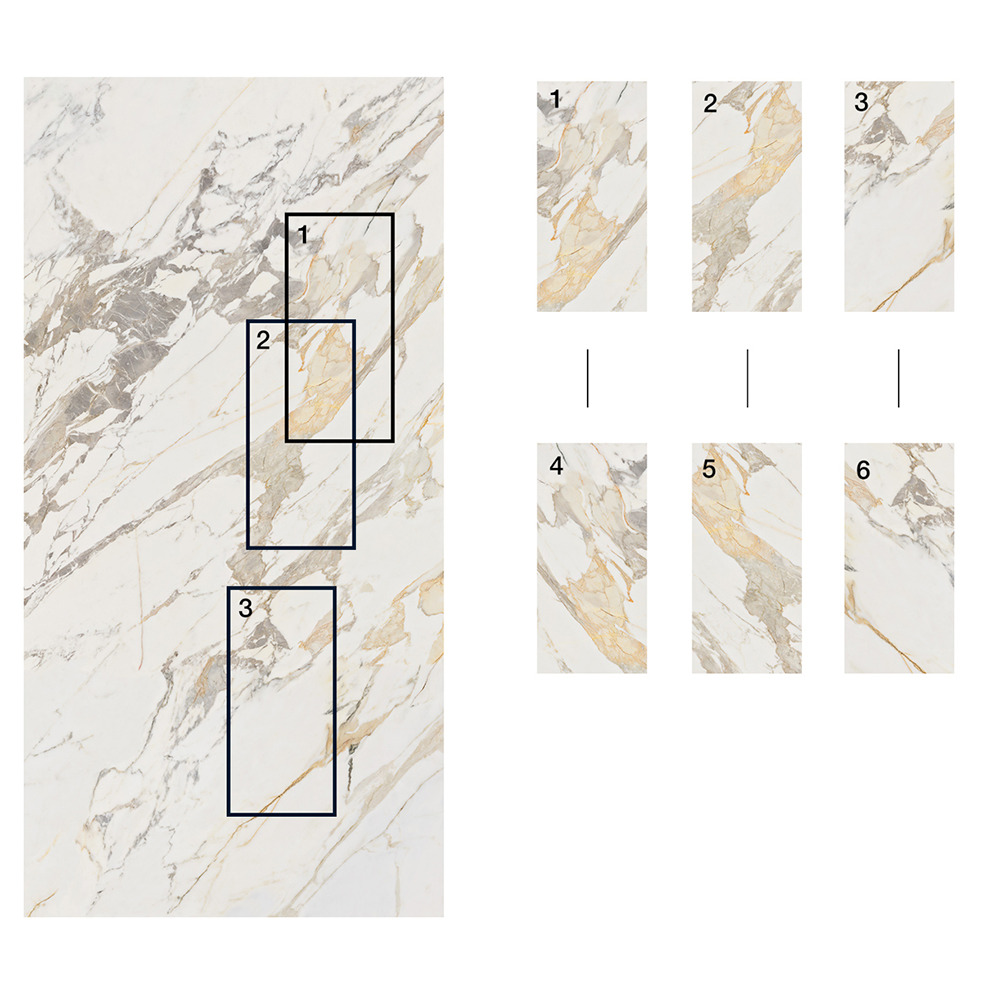
Another common way is to slightly move the image across the tile, see picture below. From a unique area design covering 2 different faces, you can create 3 or more faces. Again, technically speaking it is a different face, but if you capture strong veins and lay them together, it will look even worse.
Another way is to have a face, which is a zoom in of another face. It may look less repetitive compared to the previous tricks, but the printing quality must be much worse and very pixelated as you zoom in on a picture that is not designed for that size.
Design File Face Trick 1 – Mirroring
Design File Face Trick 2 – 3 out of 2 faces
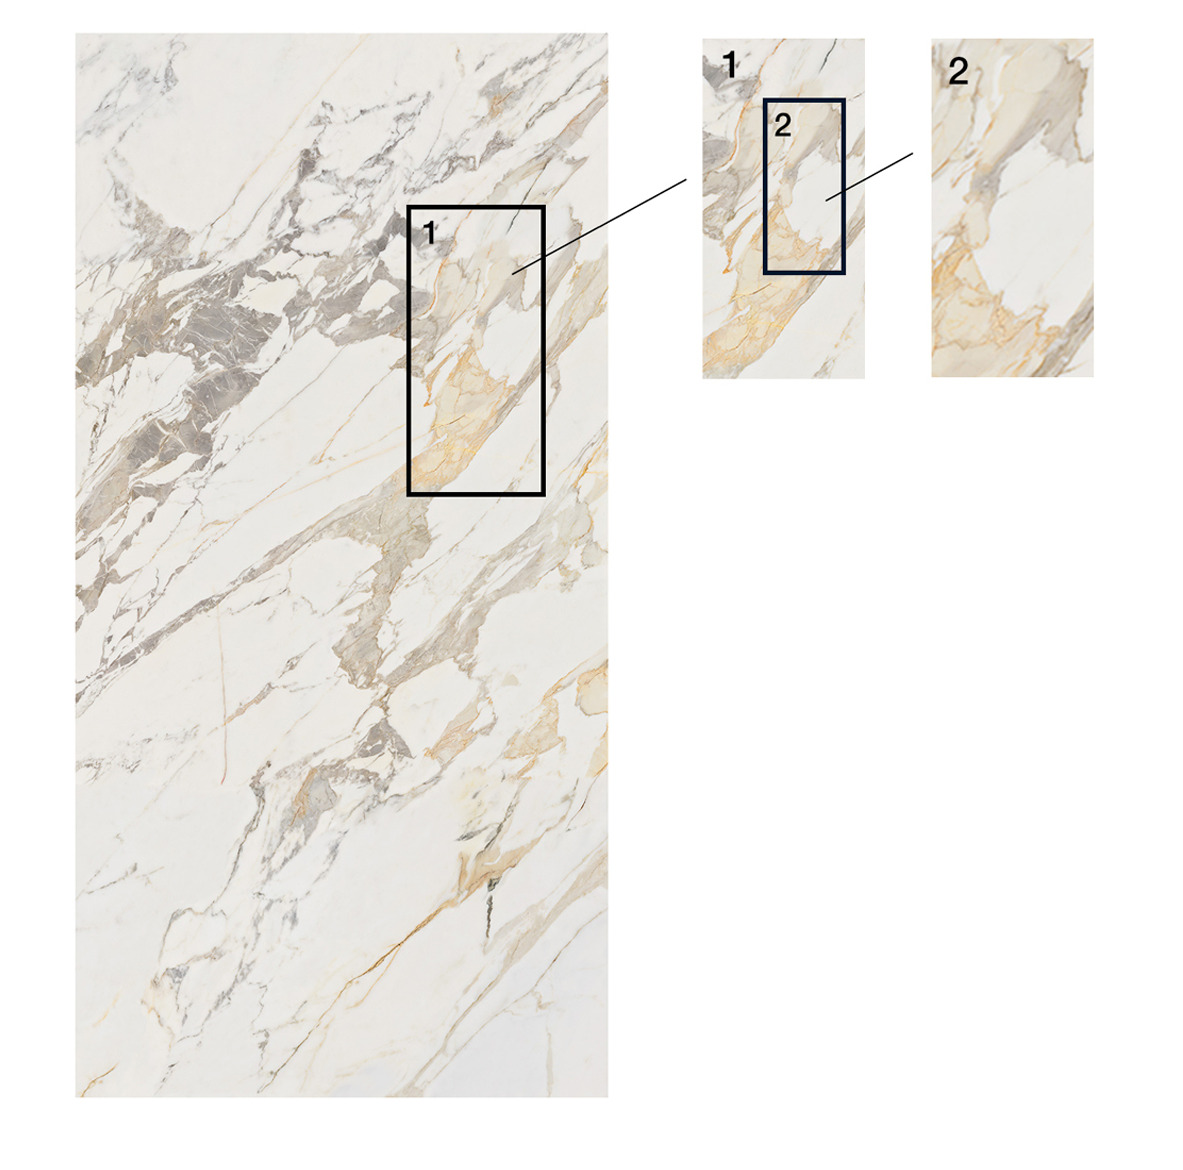
Design File Face Trick 3 – Zoom-in on the same face
Also the amount of faces depend on the size of tile, it is important to compare apples with apples. 20 faces for 600*600 result in only 7 sqm and that is approximately 2 faces for 1.2*2.7 large slab. So, if you have a tile in this size with only 4 faces, it actually covers a larger unique area than a 600*600 with 20 faces.
Left: 20 faces of 600*600mm
covering 7.2m2 / Right: 4 faces of 1200*2700mm
covering 13m2
WARRANTY
The length of the warranty provided is a good indicator of the manufacturer’s confidence in its product. At Kaolin we do provide a lifetime warranty, as we believe our product is made to last forever.
We do hope that by reading our Guide, you would have a better idea how to compare the quality of different tiles and with that information you can ask relevant questions to clarify that.